Prairie Girl Home | Painted Furniture {the first year}

With the beginning of 2017, I’m looking back at 2016 and my first year in the painting furniture business.

2016 Collage

I haven’t posted very much on the blog yet about my painted pieces, usually I post them to Instagram and Facebook, so I thought I could take one post to share the highlights of my first year in the furniture flipping business. (I kind of hate that word, flipping, because it feels like a flipper is someone who merely slaps paint on a piece to sell it and make a buck, which is so far from the case. But it still feels like the best term to describe what I do in a nutshell. “Furniture Artist” feels more accurate. So let’s say, this was my first year in the “furniture artistry” business. Sure. Let’s go with that.)

The first piece I painted and sold for Prairie Girl Home.
The first piece I painted and sold for Prairie Girl Home, in January 2016. It’s still one of my favourites!

I started painting old wood furniture as a teen and my love just grew from there. I remember dragging my mom to thrift shops to pick up old antiques I wanted to redo for my bedroom. Once I had my license, I would go to garage sales on my own and find old treasures that I dragged home. Some I painted, some things I saved for my first apartment.

IMG_8672[1]
Grey and Gold Vintage Waterfall Dresser, December 2016.
From there I continued to take old forgotten pieces from my parent’s basement, pieces friends were throwing away, pieces I hunted for around town and I lovingly painted these finds and made them my own. When my husband and I were poor, 21 and 24 year old newlyweds, our place was filled with thrift store, garage sale and hand-me-down pieces.  Our mattress and our two living room end tables, that I still remember picking out at Superstore, agonizing over spending that money and making the right decision, were the only “new” items in our home. I never let a budget stop me from creating a home. I painted, I reupholstered, I made something out of what was usually nothing. I remember searching around the different thrift stores in town for the perfect mismatched chairs for our dining room table, which I brought home to paint various shades of blue and lavender. (Yes, lavender. Oh boy, did I have an obsession with lavender. My poor husband!). I was trying to copy Monica from Friend’s dining room table and chairs. This was before Pinterest and Blogs. I drew inspiration from TV (we didn’t have cable and HGTV, so I would copy ideas from my favourite TV shows), movies, magazines (that I usually borrowed from the library) and from the real-life homes of my amazingly talented friends and family.

Charcoal Painted Antique Washstand, February 2016.

In all of the homes we have had over the years, painted furniture has always played a big role. Up until last year, I painted pieces just for our home. It never occurred to me that I could sell my work, until we had the house we live in currently. For the first time, I had enough storage space that I could start hauling home pieces that I found at “too good a deal to pass up”. I soon realized that our home wasn’t large enough to hold all of these painted pieces. I was going to have to start selling if I wanted to keep painting. So I did.

birchtables3
Birch Tree Papered Side Tables, October 2016.

I love the thrill of the hunt. I love walking into a thrift shop, never knowing what you might find. I love browsing the used sites, looking for that diamond in the rough.

White French Provincial 4 Drawer Dresser
French Provincial Style Dresser, February 2016.

Majority of the time, right from the start, I can see exactly what I want the finished piece to look like. If I don’t have a clear vision, I know enough now to wait until I do before I pull out a paintbrush. I love the entire process – finding the piece, taking it home, lovingly filling, sanding, gluing, fixing, priming, painting, distressing, waxing, sealing, lining drawers, finding the perfect knobs and pulls, and then putting it all back together and styling it for it’s “glamour shot”. I appreciate what it is – beautiful, but forgotten – and imagine it how it could be – beautiful and admired.

Mint Side Table
Soft Mint Side Table, February 2016.

These pieces have a story. That’s the beauty of solid wood antiques and vintage pieces. They have lived a life. Or two. Or three! They have often been there throughout someone’s life – from birth to graduation, then repeated that cycle for yet another child, then another. They have served newlyweds to elderly. They have been sold, passed down, donated or sometimes even thrown away. They have been moved and hauled, painted, then repainted, then stripped, then painted again. Yet, these pieces are still here. Still standing. Sure, they have a few war wounds. They aren’t brand new or “perfect” anymore. But really, just like people, having a few bumps and bruises doesn’t make you damaged. It makes you better.

White Painted and Distressed Telephone Table, November 2016.

These pieces have a story. I love that I am just another part of that story. I found these pieces, dragged them home, saw a vision for them, loved them, restored them and then they are ready to became part of someone else’s story. The piece is ready to live another life. Serve another baby or another newlywed couple or someone who saw the piece and just had to take it home. Who knows how many stories, how many lives these pieces will play a part in.

mint vanity & chair
Mint Make-up Vanity and Vintage Chair, June 2016.

They just don’t make pieces like this anymore. Well, when they do, you pay a small fortune for them. This isn’t the laminate stuff you buy at IKEA one year, only to find that soon the factory paint finish has chipped, the particle board and MDF frame is warped and it’s ready for the garbage heap the next year. (I love IKEA as much as the next person, but I also have fallen victim to the short-term life span of many of their furniture pieces.) When you buy vintage and antique pieces, you know they have lasted this long and that they will continue to stand the test of time.

straightbeadboardwatermarkgrey
French Provincial Coffee Table, November 2016.

For me, starting this small business was about more than just painting furniture. Through what was a very difficult year personally, it gave me something else to focus on. Something completely unrelated to the health crisis my family and I are facing right now. When I felt well enough, it gave me something to escape to. Even if it’s just for an hour or so at a time, it’s amazing the power doing something creative with your hands can have on a person’s well being and mindset.

Mint Painted and Distressed Plant Stand, March 2016.

I like to call painting furniture, decorating our home and creating in general my “happy distraction”.

watermark
White Blanket Ladder, December 2016

I have learned so much this first year in business. I won’t go into all the ins and outs of furniture flipping, since that would make this post massive! I will say that I have learned one thing for sure – that I still have so much to learn! I love that there are endless options when it comes to remaking an old piece. There are so many products, so many techniques and so many styles, that you could spend decades doing this job and still learn new things. I love browsing Pinterest, Instagram, blogs and magazines for inspiration. I lay awake at night and dream up new plans and ideas. I am so excited to keep on creating!

Rustic and Glam Wood Planked White Chest of Drawers, December 2016.

It was a good year.

I just finished my first piece of 2017 and it might be my favourite one yet! I have quite a few new pieces that should be listed in the next couple of months. I will try to post some on here, but you can always follow along on Instagram and my Facebook page, I’m Prairie Girl Home on both, where I post all of my painted pieces for sale!

Thanks for following along and I hope you are all having a wonderful start to 2017!

Signature

Save

Save

Save

Game On! | Week 5 ORC – The Redneck Sunroom

polyvore-screen-shot

All right folks. This is it. Week five. The last week, the home stretch. It’s time to sink or swim. Win or lose. Give up or die trying. In exactly one week’s time I will either be hanging my head in shame or you will find me here and elsewhere on the interwebs, screaming out in victory, “I did it!!!!!!!!”

Okay, so I MAY be slightly exaggerating the importance of this one little room makeover. Also, I MAY, on occasion, have a tendency to be a tiny bit over-dramatic. But after deciding to take part in Calling It Home’s One Room Challenge this season, and then proceeding to make almost zero progress (other than installing our new-to-us French door) for the first four updates, you’re going to have to forgive my dramatics, because we may just end up finishing this room on time!

In case you’re new here, my husband and myself are renovating our teeny, tiny back entrance foyer/world’s smallest mudroom/redneck sunroom (whatever you want to call it!) over a period of six weeks. To catch up on our previous posts, complete with the grotesque before pictures and all of the pretty plans we made for the space click here for week 1, here for week 2, here for week 3 and here for week 4.

polyvore-screen-shot

If you read last week’s post, I’m sure you sensed that I really had my doubts that we would be able to finish in time for the November 10th deadline. Truth be told, I mentioned it in week two, but I started this challenge with a nasty cold and seven weeks and two rounds of antibiotics later, I’m still fighting it. I have named it Cold-Mageddon. On top of that, this week my son also had round three with some sort of flu that is going around. So, due to that as well as a bunch of other things I will just call “life”, I didn’t think we would be able to pull this room makeover off. However, with a little bit of help and a few small bursts of energy, a lot can change in a week. My handy hubby managed to squeeze in some time to get started on the planking. He managed to MacGyver up some scary scaffolding. I’ll show you pictures, as long as you promise that you will do your own research on how to build scaffolding if you are attempting this yourself. I’m fairly certain rigging up two ladders and some old boards that were probably way too small for this job is NOT “up to code”. If Mike Holmes were watching, he would probably be shaking his head right about now.

We ended up using underlayment, because at $18 a sheet, it was the most affordable option. We picked it up at Home Depot and paid a little bit extra to have them cut it down into six inch strips for us. It’s a lot easier to just have it done there in the store. There are a zillion tutorials out there on “how to shiplap your walls”, so I won’t be adding one more to the mix. Basically you just need your brad nailer, something to hold in between the boards as you nail to keep a bit of gap in there (hubby used a scrap piece of planking) and a couple of different saws for making whatever cuts you need to work around outlets, trim, etc. We used our table saw, as well as a utility knife for some of the tricky, small cuts. A jigsaw would also work. Our boards were 8 feet at the longest, so when working with a wall longer than 8 feet, we cut our planks into different lengths and then staggered the boards, so that all our cuts didn’t line up. It’s kind of like laying hardwood floors.

If you really want your planking to line up horizontally all around the room, then make sure you mark where your level line is BEFORE beginning. My husband was a little upset with himself because he didn’t do this, and since our old house has extremely crooked walls, it’s going to end up that our planks will not line up perfectly all around the room. I am actually completely fine with this. I told him from the start that I wanted an imperfect and rustic look. He was seriously considering taking down an entire wall of planks to fix it. (I bugged him about this a lot, because usually he calls me the crazy perfectionist!) I convinced him to leave the planks as is.

Another tip would be to plan ahead where your planks will end up falling on your wall, so that you don’t end up with a skinny one inch section at the very top, or in a very obvious spot like above a doorway or window. If that is going to be the case, then you can change up the plan so that you don’t end up with any obviously skinny cuts. Then again, if skinny little boards next to your six inch boards don’t bother you – don’t worry about it!

We still have a couple of walls and half the ceiling left to plank, which hopefully we finish up tomorrow . I didn’t want to waste today and since my amazing mom offered to help, we got quite a bit of painting done. Let me tell you this, painting ceilings is one of my least favourite DIY jobs, but painting ceilings in a staircase using a long pole is a whole new level of torture. It just confirmed what I already knew, that I am total weakling. I worked in short one minute increments, with five minute breaks in between so as to allow my arms to regain some strength and stop shaking like jello. Pathetic. Anyhow, I didn’t feel too bad once my mom arrived and she also found the job very difficult. We managed to prime the walls that have been planked so far. I’m hoping one good coat of paint on the weekend and our walls will be looking just like an episode of Fixer Upper!

img_80031

Yes, that’s a hole in the wall. If you didn’t catch my Instagram story earlier this week, basically my husband and I decided to play a game of detective/treasure hunter to figure out what was behind this wall. I was kind of hoping there would be something cool back there, like old newspapers or love letters.  I won’t keep you in suspense, we didn’t find anything. Just an empty space. At first I thought it must have been a closet that was originally built off of the dining room, and was covered over when the dining room built-ins were added at a later time, but it doesn’t look like that was the case. Oh, and if you’re wondering why we didn’t just knock down the entire empty box of drywall that is there for no reason, and make our staircase larger, it’s because we didn’t want to make more work for ourselves. True story.

Oh, and in keeping with my “imperfect and rustic” look, I won’t be going back with a paintbrush to paint the gaps in between the boards. I like the way they look unpainted.  Also, we have way too much left to do this week!

This is the door after two coats of CIL’s Dark Secret. One more and she is good to go! Oh, and there is paint all over the glass because I never bother taping off glass. It takes me less time to scrape it off afterward with a razor blade than it does to painstakingly tape it off.

It’s exciting to see some actual progress happening in the room! We still have quite a bit more work to do, but I really think we can pull this off.

Here is our To-Do List.

  1. Plank walls and ceiling (70% complete)
  2. Replace trim (90% complete)
  3. Prime and paint walls, ceiling, trim (primer is 70% complete)
  4. Prep stairs for paint (I tried ripping up the old vinyl “runner” on the stair treads and discovered a crapload of nasty glue underneath. So my plan is to just leave the vinyl in place and paint around it. Eventually we will buy a sisal runner for the stairs and I will deal with ripping up the vinyl then.)
  5. Prime and paint stairs (risers have one coat complete)
  6. Rip out old carpet, install new subfloor on the entrance landing (I lamely attempted ripping up the carpet myself, but decided I would leave that job to someone with more muscle!)
  7. Install new vinyl floor (I’m not sure if this will happen by the deadline, but if not, I will just give the subfloor a quick coat of paint.)
  8. Replace old door with “new” French door
  9. Paint door (Two coats complete)
  10. Install new light switches (We already own these, we just need to install them!)
  11. Install new light fixture (gift from friend!!!)
  12. Install new hand rail (DIY industrial pipe rail)
  13. Add finishing details (hooks, chalkboard, gallery wall, DIY word art, baskets, small shelf?, rug?)

So we still only have one item crossed off the list, but a lot of others are close to being crossed off.

I don’t think I shared a picture of the vinyl flooring that we plan to install. We’re going to use the same flooring that we bought for our bathroom makeover that we completed for the One Room Challenge last spring. The flooring didn’t end up arriving in time for the final reveal. Here is our bathroom floor today.

img_73511

Vinyl has come a long way! It could almost pass for cement tile, right? It’s made my Mannington, and the pattern and colour is Filagree Iron. (By the way, this isn’t a sponsored post. I’m just letting you know, because I love this flooring!)

I also drew up some of my ideas for the wall decor, because with only one week left I obviously have tons of time to spend doodling and planning. Right.

img_8004edit

(The odd rectangle that is scribbled out in the bottom sketch is the big old empty box of nothing we discovered this week.)


Yes, those are tabs on my notebook. How else would I stay organized? I love making lists and plans and jotting down ideas. I know this bullet journaling craze is super popular right now, but I have to say, I’m super fond of my dollar store sticky tab dividers. #geekforlife

Do you see our super awesome hand rail? Since I’m not sure you can tell from my drawing, that’s going to be made out of industrial pipe. I’m really excited about it. As much as any sane person could be excited about plumbing parts. I can’t wait!

Originally I was planning on doing a black and white gallery wall around the entire staircase. It was going to be epic. Massive. Striking. I was planning on using printed black and white photos from some of our past vacations. Then I remembered that I am on a tight budget and I don’t have enough frames to do that large of a gallery wall and frames can be fairly expensive. Especially large ones, which I wanted. Also, printing photos isn’t cheap either. Especially large ones! So, onto Plan B. I’m still going to do a gallery wall, but it won’t be quite as large as I originally planned. Honestly, the shiplap is so beautiful, I don’t want to cover it all up! To save money,  I’m going to use only frames I already own, along with my trusty can of black spray paint. Some frames will be empty and I will also mix in some mirrors and whatever else I can scrounge up from around my house. On the wall you face when going down the staircase, I plan on making up a DIY banner using things I already own – some wood pieces, twine, a dropcloth and a sharpie pen. I’m not entirely sure about the other walls, but lots of ideas are rolling around in my head, so you’ll have to come back next week to see how it all turns out!

Oh, and you also might see my note on there about perhaps adding numbers to the stair risers. Wouldn’t that be cute? It would just be temporary until we install our sisal runner, but in the meantime it would add a fun touch. I will have to see if I have enough time and energy once everything else on the list is crossed off!

My husband and I have been so preoccupied with everything going on lately, we basically forgot until a couple of days ago that it’s our anniversary this weekend. Eleven years with this dude! What better way to celebrate than spending some quality time together working on the One Room Challenge? Right? (Don’t worry, we will do something to celebrate a little bit later in the month.)

Thanks so much for popping by, I appreciate you following along on our little DIY journey! Feel free to leave a comment below or find me on Instagram or Pinterest! Also, don’t forget to hop over to Calling It Home to see all of the other amazing room makeovers that are in progress. I can hardly wait until next week, there are going to be so many beautiful room transformations!

I hope to see you all here next week for the big room reveal!

Signature


Save

Save

Save

Save

Save

Save

Save

Save

Save

Save

Save

How to Score Deals and Decorate on a Budget – One Room Challenge Week 2

Is it really time for the week 2 update on our One Room Challenge makeover? I feel like I blinked and a week flew by!

If you are just tuning in, last week I shared that we are making over our teeny, tiny back entrance. Feel free to use the word “foyer” if you are feeling especially fancy today.

Here is the design board I shared last week, revealing some of my ideas and plans for the space.

polyvore-screen-shot

I wish I could show you some progress shots, but the space looks exactly the same as it did last week. Just to remind you, here it is in all it’s forest green, nasty carpet, floral wallpaper, bare lightbulb and cracked drywall glory.

img_7713

We really have our work cut out for us in the next few weeks if we are going to finish this space in time for the November 10th reveal!

The good news is that even though I don’t have any actual progress pictures to share, I did make some progress in nailing down some design details.

The first piece of news is that we have a light fixture! Shortly after I posted our plans last week, a very sweet friend texted me that she had read my post and had a light fixture very similar to the one in my design board. She said that it didn’t fit her space and she wasn’t planning on using it. I tried to offer her something for it, but she made some excuse about not being able to return it anyhow and insisted that if I loved it, I should have it. What a complete sweetheart, right? The world definitely needs more people like her! I graciously said thank you and told her we would have her and her sweet hubby over for a meal soon. (I’m not sure why I thought that would be a proper way to say thank you, considering that cooking is not exactly where my talents lie. Let’s just say, you won’t be seeing any recipe posts on this blog. Unless it’s of the “how-to-throw-together-a-meal-in-ten-minutes-or-less-so-that-you-have-more-time-for-decorating” variety. Hey, one can’t be good at everything. It’s not like I’ve ever given anyone food poisoning or anything. Oh wait… there was that one time. Does it count if it was your husband though? I poisoned myself in the process as well. Nobody died, no harm done. Just a good memory to laugh about now. It’s been a good 11 years or so since I poisoned anyone. So that’s progress, right? I don’t let it stop me from entertaining. Although anyone who reads this may be a little hesitant to come over for dinner. Please come! I promise not to kill you with my cooking!) The main point is this – we have beautiful, kind-hearted friends and we have a light fixture! The one in the design board above is from Lowe’s. My original plan was to try to DIY something similar. This is the one that my friend is giving me.

canvas-pendant

Canadian Tire

Gorgeous, right? Elegant, yet casual. Farmhouse, yet chic. I think it’ll be a showstopper!

Next up, the search for a French door. What I learned in my online shopping this week is that French doors are pricey. As in, I would far rather save that money for a plane ticket to France than dish out $420 for a fiberglass door with plastic grills set inside the glass. Considering my budget for this project started as zero dollars (more on that later), I needed to find a fantastic deal. I scoured our local used sites, but came up with nothing. Earlier in the week I checked our local Habitat for Humanity Restore and they did have an exterior door in the right size with a solid glass insert. The problem was it was still priced at $150 and I would have had to DIY some sort of moulding to make it look like a French door. It wasn’t the major score I was hoping for. I didn’t want to spend a small fortune, but I really was hoping for a French door. I know that it will be a huge game changer in this small, dark space. Then today my husband stopped by the Restore and texted me this photo.

20161013_110630

It was the right size, the handle is on the correct side and I don’t know if you can see that tiny price tag, but it says $15. Fifteen. Dollars. Yes. Ding, ding, ding! We found our fantastic deal! We still need to find the glass insert, but I’ve got a couple of leads so I’ll keep you posted.

Last week I talked about how I wanted some sort of “wood” paneling in the space. “Wood” in quotations because, well, tight budget. So it will probably be MDF or low grade plywood ripped into 6 inch planks. I’m not completely ruling out the super trendy shiplap, but I’m just afraid that I’m going to tire of it quickly. I’m leaning towards vertical paneling, I think it’s a more classic cottage look.

capture

via zillow

I love this inspiration image. The planked ceiling is perfectly imperfect. It looks like it’s been there for several decades, when really, this could have been done recently. It might be a little funny that I enjoy renovating our home with the goal to make it look beat up and old. I’m sure I confuse my husband to no end, but he’s used to it by now.

The only problem is that while our entrance is a very tiny space, the wall space in the stairwell is really tall. Which means that we have to rig up some sort of scaffolding. That part I’m not looking forward to. Stay tuned!

So I keep talking about doing this project on a tight budget, with the goal being zero dollars. I know what you’re thinking. You’re thinking that I’m either completely delusional or extremely bad at math or possibly both. Let me explain how I budget for renovation projects. My goal is always to not spend any money from our regular income. We need that money to pay for pesky things like our mortgage, utilities, food, gas… you get the picture. Necessary items, for which I’m very grateful we are in a position to pay for. Are they as much fun as buying used French doors and paint and plywood that we can rip into pieces and nail to our walls? No. No, they are not.  My philosophy is that if you are starting with at least something in the space you want to renovate, after deciding what you can keep in the space, sell anything else in the space that will help you finance the renovation. What is trash to you is someone else’s treasure. When I get tired of my decor, if I can’t change what I already own with paint (oh, the power of paint!!!) then I sell it. Sell your junk, so you can buy some new junk. Or buy some “new-to-you” junk. It works! In our case, this entrance is pretty bare, but I’m sure we can get some cash for both the door and the storm door that are in there right now. Since we are buying a used French door, bam, that part of the reno will be covered. Don’t ever think no one else will want your old stuff. Sell anything you have around the house that you’re not using anymore. Just today I sold an old purse for $5. It was almost ten years old and I hadn’t used it in at least a year. It was time to let it go to someone else. It took me all of three minutes to post it on a local used app and some lovely lady came right to my front door, took the purse off my hands and handed me five bucks. Win/win.

Obviously this method won’t always work when you have major renovations to do that will end up costing thousands. Still, there are lots of other ways to save money on a renovation, but I’ll leave you with just the one tip for today. Sell your old junk to help pay for new junk!

Oh and I already put that $5 towards this makeover. Check out this cute little bag I found at Homesense.

image1

This is in our front entrance. I have this thing for black and white. And wallpaper. And florals. And gold. And anything cottage/farmhouse/vintage. Okay, so this bag. Five dollars, adorable cotton, cute print, black and white – I couldn’t resist. It will look super cute styled in our finished space. Imagine it hanging on a hook, maybe beside a plaid flannel scarf and jean jacket. It will look like I just got home from a lovely stroll to the local farmer’s market on a gorgeous fall day, where I picked up a few veggies, some handmade organic soap, a fresh baguette and a few fresh sprigs of greenery. The reality will be that I’m makeup-less, in yoga pants, we don’t actually own any organic soap, our veggies are mostly from the grocery store, I never buy baguette’s because I’m gluten-free and this is fake dollar store greenery that I’ve had for ages. But you get the idea. Decorating tells a story, even if that story is sometimes imaginary. As long as it brings a smile to your face, that’s all that counts.

I do have some plans for some extremely practical additions to the space as well! Stay tuned for those.

Here is our To-Do List:

  1. Plank walls and ceiling (after we have figured out the scary scaffolding situation)
  2. Replace trim
  3. Prime and paint walls, ceiling, trim
  4. Prep stairs for paint (rip out old vinyl “runner”, fill major holes, sand)
  5. Prime and paint stairs
  6. Rip out old carpet, install new subfloor on the entrance landing
  7. Install new vinyl floor (we have zero skills here, but fortunately I have the world’s-sweetest-brother who does)
  8. Replace old door with “new” French door
  9. Paint door
  10. Install new light fixture
  11. Install new hand rail (DIY industrial pipe rail)
  12. Add finishing details (hooks, art, baskets or bins, small shelf?, rug?)

Not too bad, right? In the meantime, follow along with my makeover on Instagram and hop over to Pinterest to see more of my plans and ideas for this space!

Be sure to head over to Calling It Home to see all of the other fabulous room makeovers happening in blogland right now! There are also twenty featured designers that post their room makeovers every Wednesday, so be sure to check them out as well. There is so much inspiration and so many room reveals to look forward to in a few weeks time!

Thanks for stopping by!

Signature

Save

Save

Save

Save

Our Glam Cottage Foyer – One Room Challenge Week 1

All right friends, it’s that time again. It’s One Room Challenge time! The time of year when a group of design bloggers declare ourselves certifiably psychotic because we VOLUNTARILY sign up to complete one room in our homes over a period of just six weeks, while documenting our success (or failure, gulp) online for you all to read about! The challenge is hosted by Linda from Calling It Home, so be sure to head over there afterward to check out all of the other room makeovers that are now underway.

If this is your first visit to Prairie Girl Home, welcome! My name is Kari, I’m from Saskatchewan, Canada and I live in a small fixer-upper along with my sweet husband, who gladly supports me in all my crazy DIY shenanigans, and our sweet little boy, who despite being only in Preschool likes to spend time helping his mama ”decowate”.

I joined this challenge last spring and we tackled our very tiny 1950’s time-warp bathroom. Click here to see how we transformed our dated pink bath into a black and white chic cottage retreat. (Yes, I just called a bathroom a “retreat”. Come on. Vacations are few and far between, so half an hour in a bubble bath with a good book is definitely a bit of a retreat for this mama!)

For this makeover we will be tackling our back foyer and staircase. Now, I may sometimes refer to this room as the “foyer”, but you must know that while I am typing it I am actually saying it sarcastically in my mock “uppity girl” accent (think Mary Crawley from Downton Abbey). The truth is, calling this room a foyer is a bit of stretch. Actually, calling it a “room” is a bit of stretch! I just measured and the floor space, not including the stairs is 3’6” x 3’2”. Yes. It’s tiny! If there were a prize for smallest space tackled during the One Room Challenge, I might win it. You’re probably wondering how hard this makeover can actually be when the space is so small. Well, just have a look at these before pictures. Are your eyes ready for some UGLY?

img_7713

Hang on. It’s about to get worse.

img_7718

Yes, that is carpet. In an entrance. What are those giant stains you ask? Oh, that would be paint. From the previous owner? No. From me. Guilty, as charged. I use this space for a lot of small projects, especially in winter when I want to spray paint. Then I can prop the door open for air and I don’t have to worry about overspray because you can’t destroy what is already ugly! Completely logical thinking, right? That large white stain is from the spring One Room Challenge, when I was painting my DIY tree stump side table. I spilled half a can of paint. At 3am. Good times. (I truly must be crazy to sign up for this again!!!)

img_7728

Yuck. I know. Can you believe that we use these stairs every single day? Even though the basement is unfinished, our laundry is downstairs, as well as an office and TV area. Oh yes, and my hoard of junk extremely organized collection of various DIY and decor items not currently in use. We generally use the front door for going in and out, but this is how we access our yard and garage. So the space is well used.

Here’s where it goes from gross to downright frightening. As if unfinished basements aren’t dark and dingy enough to begin with, the forest green makes it feel like you are walking down into a deep, dark abyss you may never find your way out of. No wonder I despise going downstairs to do laundry! (It obviously has nothing to do with the fact that I just don’t like laundry and everything to do with the decor.)

img_7719

The previous owner had a deep and abiding love for this particular colour. I haven’t shared our kitchen renovation with you yet, but our laminate counters were forest green. I painted them black. They are now one million percent better than they were before. That’s the amazing power of paint. The ability to improve things by one million percent. Why have I waited so long to paint this space? It is definitely time to say goodbye to the forest green for good! The floral wallpaper border will be going as well. You can see where I halfheartedly started peeling part of it off.

img_7711img_7722

What do you think of our fancy lighting? Impressive, I know. Really, there is nowhere to go but up with this makeover!

before-collage

Severely damaged, beat up, cracked, dirty, worn, ripped and just plain ugly do not even begin to describe this space. The only update we ever did to the space was paint the inside of the back door a sleek black. (Dark Secret by CIL) The worse the before pictures, the better the after, right?

Oh, and did I mention you can see this space from our front entrance and from our main living areas?

img_5314

This is the view when you first walk in our home. I shared this picture to Instagram, but I edited it in black and white because I was trying to hide the ugliness that is the back entrance. (Okay, I tried, I really did, but I can’t type “foyer” without laughing. We obviously aren’t “foyer” people. We are definitely simply plain old “entrance” people!)

I’m going to throw in a “before the before” pic. This is a slightly different angle than the pic above, but you get the general idea. This is with the previous owner’s furniture.

img_7634

We’ve come a long way, but we have a little more work to do yet!

Okay, enough of the ugly before pics. Are you ready to see the design plan?

polyvore-screen-shot

The items you see in my design board are not necessarily the exact items I will be using, since a lot of this makeover is going to depend on what I can find on sale or used and what I can DIY, but this gives you a general idea of the direction I am headed.

The one item I really don’t want to leave out is the french door. Here in Saskatchewan, we have very long, cold winters. What we do get though, is a decent amount of sun. The problem is we definitely don’t have enough windows on the back side of our house to allow the light in. I am really hoping we can find one in the size we need at the Habitat Restore or elsewhere used. I really think it will be a game changer in this space!

I am sticking with the same palette we have used in the rest of the house – a heavy dose of black and white, with touches of wood, natural texture (think woven baskets, sisal rugs), and maybe a touch of gold. My style is a mix of farmhouse, cottage, industrial and vintage, with a bit of traditional mixed in there. That wasn’t confusing at all, right? I like to call my style “Glam Cottage”, but really it’s always changing. That’s what keeps it fun!

Here are a few spaces that are inspiring me.

Image via Hammersmith Atlanta

I just love the crisp black and white! It never goes out of style.

boardandbatten

I couldn’t find the source for the image above, so if anyone knows where it’s from, please let me know and I will edit it. I’m just in love with the wide floor to ceiling board and battens, set closer together than you usually see. Together with those gorgeous black and white frames and the industrial farmhouse sconces, set against that warm wood – ah! So striking.

Image via Houzz

Isn’t that industrial pipe hand rail awesome? I also love the classic vertical planking. I think it has more longevity over the more trendy shiplap that we see everywhere right now. (I love you Joanna Gaines, but you’re just too dang good and now every woman in North America wants to be you!!!)

Next week I will be back with more details about how we will be finishing off this space on a very tiny budget. This is where creativity, elbow grease and being a hoarder of all things DIY come in handy! If you would like to see updates along the way, follow me on Instagram. I also created a Pinterest board just for this makeover, so if you are a lover of Pinterest like I am, you can check that out.

Thanks for stopping by and hope to see you here next Thursday!

Signature


Save

Save

Save

Save

Save

Save

Save

Save

Save

Save

Our Simple Summer Dining Room

I am so excited to be sharing our summer dining room with you all today! Since summer is in full swing I have joined a group of talented bloggers to share how we refreshed our homes for the summer months. The links are shared at the bottom of this post, be sure to check out all of the beautiful summer rooms and projects!

titlephoto

For this room refresh, I decorated our summer table with a lot of natural elements and my signature palette of black and white. Hey, black and white are definitely colours! The heavy doses of white feel light and airy and help our relatively small home feel much larger than it really is. The touches of black ground the space and add drama. The small hits of gold and the natural wood and bamboo elements keep things from feeling too cold or sterile. I added quite a bit of greenery, which really makes the space feel fresh for summer!

For this summer refresh, I only used items I already had on hand. The table runner is a simple canvas drop cloth. This is a really affordable way to add big impact! Having the runner fall to the floor adds elegance and a touch of drama.

The two main centerpieces are just candlesticks that I have had forever (okay, not forever, but they were a wedding gift, so over ten years), that I spray painted white. I balanced white teacup saucers on top and added dollar store greenery on top of those. I secured each piece with foam tape. That’s it! They add so much impact, for such a small amount of work and very little money!

above

The rest of the table-setting is made up of mason and pasta jars, rocks and small white candles. When you are trying to decorate on a budget, always think about using multiples of items. Just one or two mason jars would have had very little impact. Add a dozen though, and you’ve made a statement.

tolivingroom

The place settings were so simple to create. These are our everyday dishes, from Ikea. (I love these plates, but if you are considering purchasing, just keep in mind they chip very easily!) The cloth napkins I have had for a few years. I just love that little “bon appetit” peeking out from beneath the salad plate. I clipped the rosemary from our backyard garden and tied it together with simple jute twine.

The “love lives here” word art was a very simple DIY. It took all of maybe 20 minutes. My love for sharpie pens knows no bounds!

builtins

Our built-in cabinetry is probably the feature I love the most in our dining room. Styling the shelves is somewhat challenging, but with practice it’s becoming one of my favourite things!

I love the small and slightly sentimental details that come with old pieces. The center chair came with the house. The previous owners left it behind. She was just sitting there, in the basement, beside the washer, very old and slightly neglected. After a bit of love and attention, she is shining again! I love that it’s a small piece of the history of the house that gets to live on. It’s the little things. The small bentwood chair was handed down to me from my cousin, when I was a teen and I’ve carried it with me to every home since! The larger bentwood chair was one of my first thrift store finds just after my husband and I were married. I was 21, we were poor and I was hunting for two thrifted chairs to go with our hand-me-down table and the two other wood chairs we already owned. I remember thinking that $15 was a bit much for one chair, but I went for it, thinking it still had a long life ahead of it. I was right!

bench

The farmhouse bench was found on a local online used site . I saw it pop up for $40 and didn’t hesitate to buy it! Our table is from Ikea, but we purchased it from a local used site at a fraction of the resale price.

looktohallway

The greenery you see in the white vase on our kitchen island were clipped from the small tree in our front yard. Some of the best decor is straight from the outdoors!

couchview

Our main living areas are very open concept. When we bought our house, we made tearing down the walls that separated the kitchen from the dining and living room a priority. I really love open concept living, but it also means that our home can very quickly feel cluttered and messy! Keeping our colour palette very neutral keeps things feeling calm, even when a bit of mess builds up.

windowseat

I have always wanted a window seat and now we have one! Do you want to know a little decorating secret? That little pillow you see there is just wrapped with a tea towel. I didn’t even bother pinning it in place. Sometimes you just want a quick fix!

pianoangle

Seeing all of that black and white, along with the pops of summer green just makes me so happy!

straighton

Sources

  • Wall and Cabinetry Colour – Chantilly Lace by Benjamin Moore
  • Closet Door Colour – Onyx by Benjamin Moore
  • Floral Wallpaper – Norwall – discontinued, similar, similar
  • Chandelier – Home Depot about 2 years ago, same
  • Cabinetry Hardware – knobs, pulls, similar,
  • Table Runner – similar
  • Blinds – same, similar
  • Table – same, similar, cute and budget friendly
  • Bench – thrifted, similar
  • Chairs – pre-owned, classic windsor, love these ones, modern farmhouse option
  • Dinnerware – same, cute and affordable, ornate option
  • Topiary Centerpieces – DIY, similar, candlestick holders, topiary
  • Sofa – Ikea
  • Metal and Wood Side Table – Thrifted, similar
  • Piano Lamps – Homesense about 5 years ago, with DIY ribbon trim, similar, similar
  • Faux Antelope – Homesense, spray painted black, similar, similar

Thank you so much for stopping by! Please feel free to leave a comment below! Don’t forget to visit the other talented ladies who will be sharing their summer home refreshes today, tomorrow and Sunday on their blogs. The links are provided below. I’m sure you will find so much inspiration for your own home!

Be sure to check us out on Instagram as well, with the hashtag #summerhomerefresh. You can find me there under @prairiegirlhome.


Summer Home Refresh

Friday

Honey N Hydrangea

Bees N Burlap

Simple Cozy Charm

Hip Hip Home

Belle Amour Designs

Hood Creek Log Cabin

Prairie Girl Home

Saturday

The Creative Nook

The Home I Create

A House With Books

1111 Light Lane

Joyfully Rooted

Bright Yellow Door

Sunday

Gratefully Vintage

Farmhouse For Five

Love Your Abode

My Sunset Avenue

One Horse Lane

Little Home Reloved

*Please note, some affiliate links are used. This means that when you purchase an item through one of these affiliate links, you receive the same great price and Prairie Girl Home receives a small commission. All opinions expressed are entirely my own. Thank you for your support!


Save

Save

Save

Our Cottage Glam Bathroom – Source List and Budget Breakdown

pinterest bathroom collage

Hello! Today I wanted to share a detailed source list and budget breakdown of our completed Cottage Glam bathroom. It has been just over two months since we finished up this makeover and we are still so in love with how it turned out! It was a lot of work, but so worth it. The One Room Challenge was just the push I needed to tackle this little room. If you missed the reveal, you probably want to check out that post right here.

TitlePic

The goal with this makeover, was to update the space and give it a fresh look, without doing a full renovation. We hoped to improve the space dramatically, without spending a lot of money. I feel like we definitely met our goal!

Call me nosy, but when I read about someone’s renovation or makeover, I am always curious what their actual cost was. This is especially the case if they are doing the project on a tight budget! Hopefully you find this post helpful in planning your own bathroom makeover. Here is a breakdown for you of how much a small renovation like this might cost you. If no price is listed, this is because I already owned the item. I have included links to the actual items I purchased for this makeover, as well as some similar items. All prices are in Canadian dollars, unless otherwise noted.

Also, even though I named the sources and included links for most of the accessories, I did not include these in the final cost of the renovation. I only included fixed items that would remain with the house if we ever were to sell it. If I missed any sources you are curious about, just ask in the comments!

20160512_120033

  • Wire Sconce – Lowe’s – $64.99 (spray painted in Rustoleum’s flat black) | similar (great price) | industrial farmhouse option I love
  • Glacier Bay Toilet – Home Depot – $110.00
  • Black Wire Hanging Basket – Michael’s – $10.49 (with coupon, never go to Michael’s without using a coupon!) | similar | similar

20160511_180244

  • Danze Faucet – Canadian Tire – $38.99 (Sale Price) | Amazon
  • Glass Milk Jug – Michael’s – $3.29 – DIY Chalk Painted
  • Mason Jar Soap Dispenser – Bed, Bath & Beyond – $10.99 | similar
  • Black and White Towel – already owned, Walmart (no link) | similar | turkish linen option | cute option

20160511_181206

  • Acrylic “Glass” and Chrome Knobs – already owned, found on local used site | same
  • “Rose Petal & Vanilla” Bar Soap – Marshall’s – $4.99 | cute option | gift set of 4, beautiful packaging
  • White 4×6 Frame – IKEA Ribba (already owned) – DIY scrapbook paper quote
  • Small White Frame – Michael’s – $1.50 – DIY Chalkboard M using black card stock and chalk
  • Ceramic Tray/Soap Dish – Michael’s – $1.50
  • Cream Bar Soap – Dollarama – $1
  • Mason Jars – (owned, spray painted lids in Rustoleum’s flat black)

20160511_181913

  • Birch Tree Wallpaper – Bouclair Home – $39.99 x 3 = $119.97 (I LOVE this wallpaper, but just FYI it was very thin and ripped easily, which made it difficult to apply. We ended up using way more wallpaper than we should have needed to, increasing our cost, simply because so many pieces ripped during installation and we had to throw away those pieces.) | similar
  • Towel Hooks – Home Depot – $ 5.98 x 4 = $23.92 – chrome (black not online) | similar
  • Black and White Turkish Linens – (I already owned these. I LOVE these towels, they dry so quick, are super absorbent, gorgeous and a great price considering they are the real deal, straight from Turkey! When ordering, just say you want the same towels as Kari from Prairie Girl Home) – Burlap, Linen & Lace | similar | similar
  • Black Frames – Dollarama – $3 x 3 = $9 | similar
  • Artwork – Secret Paris Color Your Way to Calm (I chose light pink and charcoal grey pencil crayons) – $11.02 (already owned)

20160511_181614

  • White MDF Shelf – Rubbermaid – $15.38 (We could have saved money here and used a piece of wood from our stash, but we ran out of time to get it cut and painted, so I took the easy route and bought a pre-cut, painted shelf)
  • Brackets – Rubbermaid – $9.88 x 2 = $19.76
  • Large White Bath Towels – gift, already owned | similar
  • White Basket – (from Home Outfitter’s, ten years ago) | similar
  • Terracotta Planter – Dollarama – already owned, painted white
  • Faux Plant – IKEA – already owned
  • White Antler Hook – Bouclair Home – $19.99 | another option | cute single hook

20160511_180746

  • White Cotton Curtains 96″ length – JYSK – ribbon trim DIY – already owned | similar | another affordable option
  • Fabric Shower Curtain Liner, Extra Long – Bed, Bath & Beyond – $31.99 (with coupon) | similar (affordable)
  • Bath Rug – Bed, Bath & Beyond (sale price – $14.99) | similar
  • Tree Stump Side Table – DIY (materials cost around $10)
  • Toilet Paper Stand – found on local used site, spray painted black – $8 | similar

20160511_175005

  • Bathtub Tray  – Michael’s unfinished wood plank plaque – $13.19 (with coupon) – I found this in the aisle with the other unfinished wood projects, removed the twine attached for hanging, painted it with some leftover gloss white paint and added some rubber feet so it would sit snug on my bathtub. Easy peasy! This would be easy to DIY if you have some leftover wood and then just paint or stain and poly, whichever you prefer. Again, I was running short of time at the end of the One Room Challenge and it was easier to just buy the piece ready made, all I had to do was paint.
  • Teacup – Homesense – $4.99 | pretty option | modern option
  • Scrub-brush – Dollarama – $3 | similar
  • Ceramic Tray – Michael’s – $1.50

Chandelier Before and After

Remember the steal-of-a-deal $5 chandelier I found on a local used site? One of the best lessons you can ever learn when it comes to home DIY is never underestimate the power of paint! It is the cheapest, easiest and often the most dramatic way to update ANYTHING. Walls, floors, furniture, accessories, light fixtures – nothing is off limits when it comes to paint! For this little chandelier, we removed the wiring and sockets, since it was going in the shower, where there is no electrical box. Then I painted it with a can of Rustoleum and added some faux candles. Easy and affordable – two of my favourite things when it comes to DIY!

  • Chandelier – found on local used site, stripped the wiring and spray painted black – $5
  • Battery Operated Faux Candles – Michael’s – $14.99 (with coupon) | another option with a timer

  • Clock – IKEA – about 15 years old, painted the frame black | cute and affordable option
  • Black Curtain Rod – JYSK – $29.99
  • Black Curtain Rings – JYSK – $9.98
  • Sink Skirt – fabric reused from old shower curtain
  • Velcro Strips for attaching to sink – Dollarama – $1
  • Privacy Window Film – Home Depot – $10.97 (we have tons of leftovers)

Materials

  • Pine Wood Planks – (already owned)
  • MDF Trim – (already owned)
  • Baseboards – existing
  • Lattice Trim and Quarter Round for medicine cabinet makeover – (already owned)
  • Miscellaneous – TSP, caulk, painter’s tape, corner trim piece, No Nail’s adhesive – $45.00

Paint

  • Primer – Gripper –  FREE (buy one, get one sale) – $15 (quart) – used on linoleum floor and shower ceramic tile (so far, this is holding up great!!!)
  • Floor Paint – leftover interior paint – (I mixed Behr’s Ultra White and Glidden’s Whiter Shade, eggshell finish)
  • Primer – Zinsser Bull’s Eye 1, 2, 3 – $13.99 – used on wainscoting and medicine cabinet
  • Benjamin Moore Advance – Chantilly Lace, pearl finish (already owned from kitchen reno, but used about a 1/3 gallon) – used on wainscoting, medicine cabinet and shower tile
  • Ceiling Paint – CIL – Chantilly Lace, flat – $19.99 (quart)
  • Door Paint – Dulux Melamine Alkyd – CIL Dark Secret (already owned)
  • Door Knob – original to the house, spray painted in Rustoleum Metallic Gold (already owned)

Total

The total cost of materials and fixtures was $517.95. We were also able to sell some of the original fixtures and accessories on local used sites. This is a great way to bring down the cost of a project! Don’t forget that what is “old and used” to you, might be just what someone else is looking for. People are often looking for secondhand bathroom fixtures for their rental properties or summer cabins. It doesn’t hurt to try! Our total proceeds from sales was over $90! This would have been higher if I hadn’t of accidentally dropped and shattered the toilet tank lid, which made it impossible for me to then sell the toilet! This brought our total renovation cost down to $427.95.

The total cost of accessories was $176.38. Again, for the purposes of this post I only included the cost of the materials and fixtures that would stay with the house if we were to sell. This gives you an idea of how much you could save doing a simple update using a lot of DIY and creativity, verses doing a traditional full bathroom renovation.

pinterest bathroom collage

When I first added up the total cost of this makeover, I was a little disappointed. I had kind of hoped the cost would come in around $300. However, as so often happens in renovations, we went a bit over our original goal. The biggest costs were the new toilet, at $110 and the wallpaper at $120. I am so happy we replaced the toilet, the old off-white one would have stood out like a sore thumb. The wallpaper, even though it cost us a bit more than we had originally calculated because of the installation problems, was totally worth it. I think it makes the bathroom! A can of paint would have been a lot more affordable, but I’m so happy we splurged on the wallpaper. Although, if you read my week two progress, you know that wallpaper can really be a huge expense. Some of my inspiration wallpaper choices from that post would have cost a lot more than the cost of our entire renovation total!

Budget Renovation Tips

If you are hoping to do a similar update to your bathroom, here are some of my biggest money-saving tips.

  • DIY! DIY! DIY! Do as much of the work yourself as you possibly can. Almost anyone can paint. If you don’t know what you’re doing, look for a tutorial online! Be smart though and know when to hire out a job that’s beyond your skill set.
  • Shop around for sales, clearance items, use coupons, go to yard sales, check local used sites for deals, check for curb-side or back alley finds.
  • Shop your house! Use what you already have. You’d be surprised what you might have stashed away in your garage or basement that you can reuse. What you were once tired of, can feel completely new and fresh with a coat of paint!
  • Try to update instead of replace, wherever possible. In this renovation we kept the sink, bathtub, shower tile, medicine cabinet and even the old vinyl flooring. The drywall, baseboards, trim and window are all original. Everything feels fresh and new once we painted it, (even that old shower tile and vinyl flooring!), and the pink sink and tub are now beautiful character pieces, instead of ugly eyesores.
  • When you do need to replace, try to keep plumbing and fixtures in the same position. We saved money by keeping the light fixture in its original location, and simply replacing the dated fixture.  If you are doing a full renovation, a lot of money can be saved by keeping tubs, toilets, sinks and light fixtures where they originally were.
  • Spend your money where it will make the biggest impact. In our bathroom makeover we chose a statement making birch tree wallpaper, but one that was still budget-friendly and only installed it on the upper third of the walls. At $120, it came to nearly 30% of our small budget, but it packs a big punch! I don’t think the makeover would have been the same without it.

Overall, I’m really proud of the transformation we were able to achieve. When you consider that the average bathroom renovation in Canada costs $9,100 – well I am very pleased with our total of $427! We just saved ourselves $8,600! Of course, ours was really an update, rather than a full remodel. I am still confident that this update will last us for many years. The goal was to improve on what we had originally. We did that, and so much more! We are in love with our little bathroom remodel on a budget!

Signature


Some affiliate links are used. This means that when you purchase an item through one of these affiliate links, you receive the same great price and Prairie Girl Home receives a small commission. Thank you for your support!


Save

Save

One Room Challenge Week 6 – A Glam Cottage Bathroom Reveal

TitlePic

We made it. I almost can’t believe it, but we survived. Making over one room in six weeks was chaotic at times, to say the least, but so worth it. I am so excited to share with you today our newly completed cottage glam bathroom makeover!

TitlePic

Just to refresh your memory, or if this is your first visit to Prairie Girl Home, here is what we started with.

bathbeforeedit

My challenge was to update this space, without doing a full demo and renovation. That meant we were keeping the original 1955 pink bathtub and sink! I’ll be completely honest, I wasn’t even sure until a couple of days ago that I was going to be happy with the results. You see, at first I thought this tub and sink were a cute shade of blush pink. Nope. They are dusty rose. Blush pink is like an adorable, trendy and fun twenty-something girl, while dusty rose is the shy and slightly uncool sister. I kept going though, hoping that with all of the black, white and grey shades going into this bathroom, the dusty rose would somehow grow into the mature, subtle and elegant lady that she is. I was right. The ugly duckling grew up into a beautiful swan.

20160512_120436

I’m in love, you guys. Love. I can’t tell you how proud I am of this little space. That sounds like I’m tooting my own horn, but hey, I’ve think I’ve earned a little tooting rights. Wait… that didn’t sound right. Let’s blame it on the fatigue. Over the last week, we poured our blood, sweat and tears into this little bathroom makeover. More work happened in the last week, than the other five combined! I told you, I’m a horrible procrastinator, but that also means I’ve learned to work well under pressure.

Today, I will try to talk less so we can focus on all the pretty pictures! I will come back next week with a complete source list and budget breakdown. I love when people share their budgets, so I’m opening up and sharing! There were also a lot of DIY projects in this little room, so I will be back to share a few tutorials for those as well.

20160512_120054

I’m still amazed at how our medicine cabinet transformation turned out. The power of trim and paint, so simple, yet so powerful!

20160512_115835

I had planned on sewing an adorable sink skirt, with either neat and tidy pleats or ruffles or gathers, but time got the best of me. Instead, I used our old shower curtain and some dollar store velcro adhesive to hobble together this sink skirt. For 15 minutes of work and maybe 2 dollars in materials, it’s a huge improvement over the before!

20160511_180244

I just love our new little faucet. The only items in the bathroom that were actually updated were the faucet, the light fixture and the toilet. I’m so glad we made those choices, because I think all three things go a long way to updating the space.

20160512_120033

The new white toilet is awesome! Who knew I could be so excited about a toilet? We looked for a used white toilet in decent condition, but our search came up short. So we bought the least expensive one we could find and I’m so glad we decided to take the plunge. (Oh my. I didn’t even plan that one. Help me. I need sleep!) Okay, moving on. The white is so clean and fresh, the old beige one would have been such an eye sore next to all our new pretty white trim. I also love that it’s just a regular height, round bowl toilet. Life is about the little things and a white, regular toilet makes this girl happy!

IMG_6042

The light fixture I had planned for the space ended up not fitting in the space.  I had a backup option in mind at Lowe’s, but they were out of stock. The lovely gentleman in charge of the lighting department though, was kind enough to sell me the display model! It was brown, so I gave it quick coat of black spray paint. (Don’t look too closely at my spray job, drips are what happen when you rush spray painting!) We actually had to hang it upside down, or we would not have been able to access the bulb. The look has really grown on me! I love the wire cage. The matte black looks so good against our new grey and white birch tree wallpaper.

Oh, the wallpaper. I have this thing for wallpaper. I love it. However, my poor mom, who so lovingly offered to install it for me and who is an extremely talented DIY woman herself and has applied wallpaper probably dozens of times, had a horrible time with this paper. Unfortunately, it was paper thin and ripped very easily. She persevered though and got the job done. It looks amazing! I think it’s the real showstopper in this little bathroom.

20160511_181913

This might be one of my favourite views. I have a lot of favourites, but those turkish linen towels (which are amazing, by the way), against the bright white wainscoting, with the thick trim and our new sleek black hooks, set against that gorgeous wallpaper with those sharp black frames and DIY art – love, I tell you. Love.

Speaking of DIY art. I had a few ideas for this spot, but I never know what will work until I see it all come together at the end. So one of my last minute DIY projects were putting together this cute little trio. The frames are from the dollar store. The pages are from my “Secret Paris” adult colouring book. I just realized how that may have sounded. Adult, as in, us old people can colour too and not adult, as in, hide from your children’s eyes. (Although, come to think of it, I do hide my book from my kiddo, as well as my good pencil crayons, because a mama has to have some things just for herself!) I just used pink and grey pencil crayons to give the prints just a touch of colour. I love how they turned out!

20160511_181231

Another last minute DIY art project, was this cute little chalkboard frame I whipped up.

20160511_175204

I decided it might be a good idea for me to label the doors in our house. I plan on making matching ones for our bedrooms and our office. You know, just in case we get lost in our 960 square foot mansion.

20160511_180355

Oh, and that cute little toilet paper stand? Eight dollars. I found it used online. It was oil rubbed bronze, but that’s nothing a little spray paint couldn’t fix.

20160511_180746

20160511_181732

This little tray was another last minute addition. I had planned on making one, but I ran out of time. Then I was in the unfinished wood aisle at Michael’s, and saw this little wood sign. A little white paint and it made the perfect little bathtub tray. I have always wanted one of those! Honestly, one of favourite ways to unwind is with a hot bubble bath, a good book and a cup of tea. So in addition to looking pretty, this will actually get a lot of use!

20160511_175005

I searched for a few accessories in dusty rose, to tie in the tub and sink. Do you know how many accessories there are in dusty rose? Not many. I’ll tell you that. Blush pink, like I said, is the trendier, cool sister. But check out that adorable little dusty rose teacup! Gorgeous. So there you go, dusty rose for the win.

20160511_174801

We have to talk about the stump side table. I’m so happy I made time for this little DIY project. My plans for it changed a few times. After a complete disaster with some grey stain, that they should really just call, “extremely ugly shade of grey paint”, I just decided to go back to plan A and paint it white. I couldn’t be happier with how it turned out. That little split in wood at the side? Perfection.

20160511_174748

I’m also a little obsessed with that adorable little milk jug vase. Again, the vase is a Michael’s find that I transformed with a little chalk paint. That adorable little apple blossom I cut from the tiny apple tree we planted last fall in our backyard. Yes, I love it so much, I kept on moving that cute little vase into almost every shot. Can you blame me?

20160512_120137

The little shelf above the door was another project we finished up at the eleventh hour. I’m so glad we did. In a small bathroom, this is a great way to squeeze in a little extra storage. Storage, OR more display space for cute accessories! Either way, it’s great.

20160511_181614

Okay, now that I look at this, I want to move that little antler hook down about an inch and a half. Although, it is very sharp. It wouldn’t be a good thing if it ended up poking my tall hubby in the eye. All right, it can stay where it is.

All of the black and white just makes my heart go pitter patter. I have this thing for black and white. It gets me. Every, single, time.

20160511_181122

Remember the $5 used chandelier I shared with you on week two? Not bad for five bucks, eh? Spray paint can work miracles, my friends, miracles. Those are battery operated candles, by the way. So no need to worry about electrical and water mixing, or flames falling on our head whilst we bathe. That would be sad. Safety first.

A few more details.

IMG_604420160512_11575920160511_18025020160511_18193020160511_17583620160511_181206

20160511_175741

My husband says one of his favourite things about the makeover is that we hung the curtain rod at the ceiling. I agree, it does make the room feel taller. I also think that using a pair of curtains, instead of just one, frames the tub so nicely.

20160511_180704

I don’t think I can pick a favourite thing. Seriously, I’m in love with all of it!

I think what I learned with this renovation, is that if you have something you consider to be an eyesore, like a pink bathtub, but have very little money to change it, that doesn’t mean the room still can’t be beautiful. I knew we could make it better, but really, I had no idea that I would love the transformation this much!

HowtoUpdatea1950'sPinkBathroom

Let’s remind ourselves how far we came with a few before and after shots, because who doesn’t love a good before and after?

before&afterbath

I am so happy we painted that old tile! It was a big job, but wow. That bright white tile looks almost new.

BeforeandAfterCabinet

beforeandafterdoor

PicMonkey Collage

Floor Before and After

Yes, I painted the old linoleum floor! I’ll be back to share a few details on that DIY. If you recall, I did end up ordering some new vinyl, but sadly, it did not arrive in time. I have to say though, if I had not have already ordered it, I may have ended up just keeping this painted floor. Huge improvement, right?

It’s hard to believe we lived with the ugly before for nearly two years! Although, considering the amount of work that went into this makeover, I can believe it. Hours and hours went into this tiny little room. Was it worth it? Most definitely!!!

Now after all of that hard work, I think I’ve earned myself a nice hot bubble bath!

20160511_183319

If you would like to get fully caught up on this transformation, here are the previous One Room Challenge posts.

Week One – Our Cottage Bathroom Makeover

Week Two – Our Cottage Bathroom Design

Week Three – Cottage Bathroom Progress

Week Four – Trim, Paint And Other Progress

Week Five – The Home Stretch

I will update this post with links to any future posts related to this makeover. Stay tuned for the full source list and budget breakdown coming next week!

I want to say a huge thank you to my sweet husband and my loving mom who helped out with this little makeover. I couldn’t have done it without them!

Another huge thanks to Linda, of Calling It Home, for creating and hosting the One Room Challenge! I’m so glad I took the leap and jumped into blogging, starting with this challenge. So far, blogging has been a huge creative outlet for me and I am loving it! If you haven’t had a chance to check out the makeover reveals that the featured designers shared yesterday, you can do so here. All of the other guest participants, like myself, shared their makeover reveals today! Check them out here. You should be able to find loads upon loads of eye candy and inspiration!

Thank you so much for following along! I appreciate it! Feel free to leave a comment below, or catch up with me on Instagram.

UPDATE: Click here to see the source list and the budget breakdown for this makeover!

UPDATE: Here is how the bathroom looks now, with our new vinyl flooring installed!

img_73511

Can you believe it’s vinyl? It really added the final finishing touch!

Signature


Linking with:

Thrifty Decor Chick – Before & After Party


Save

One Room Challenge Week 5 – The Home Stretch

If this is your first visit to Prairie Girl Home – welcome! I am glad you stopped by!

static1.squarespace.com
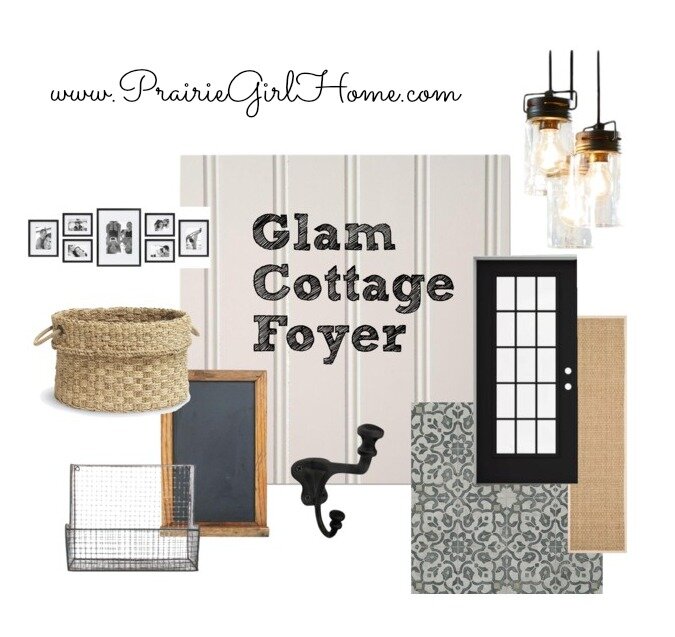
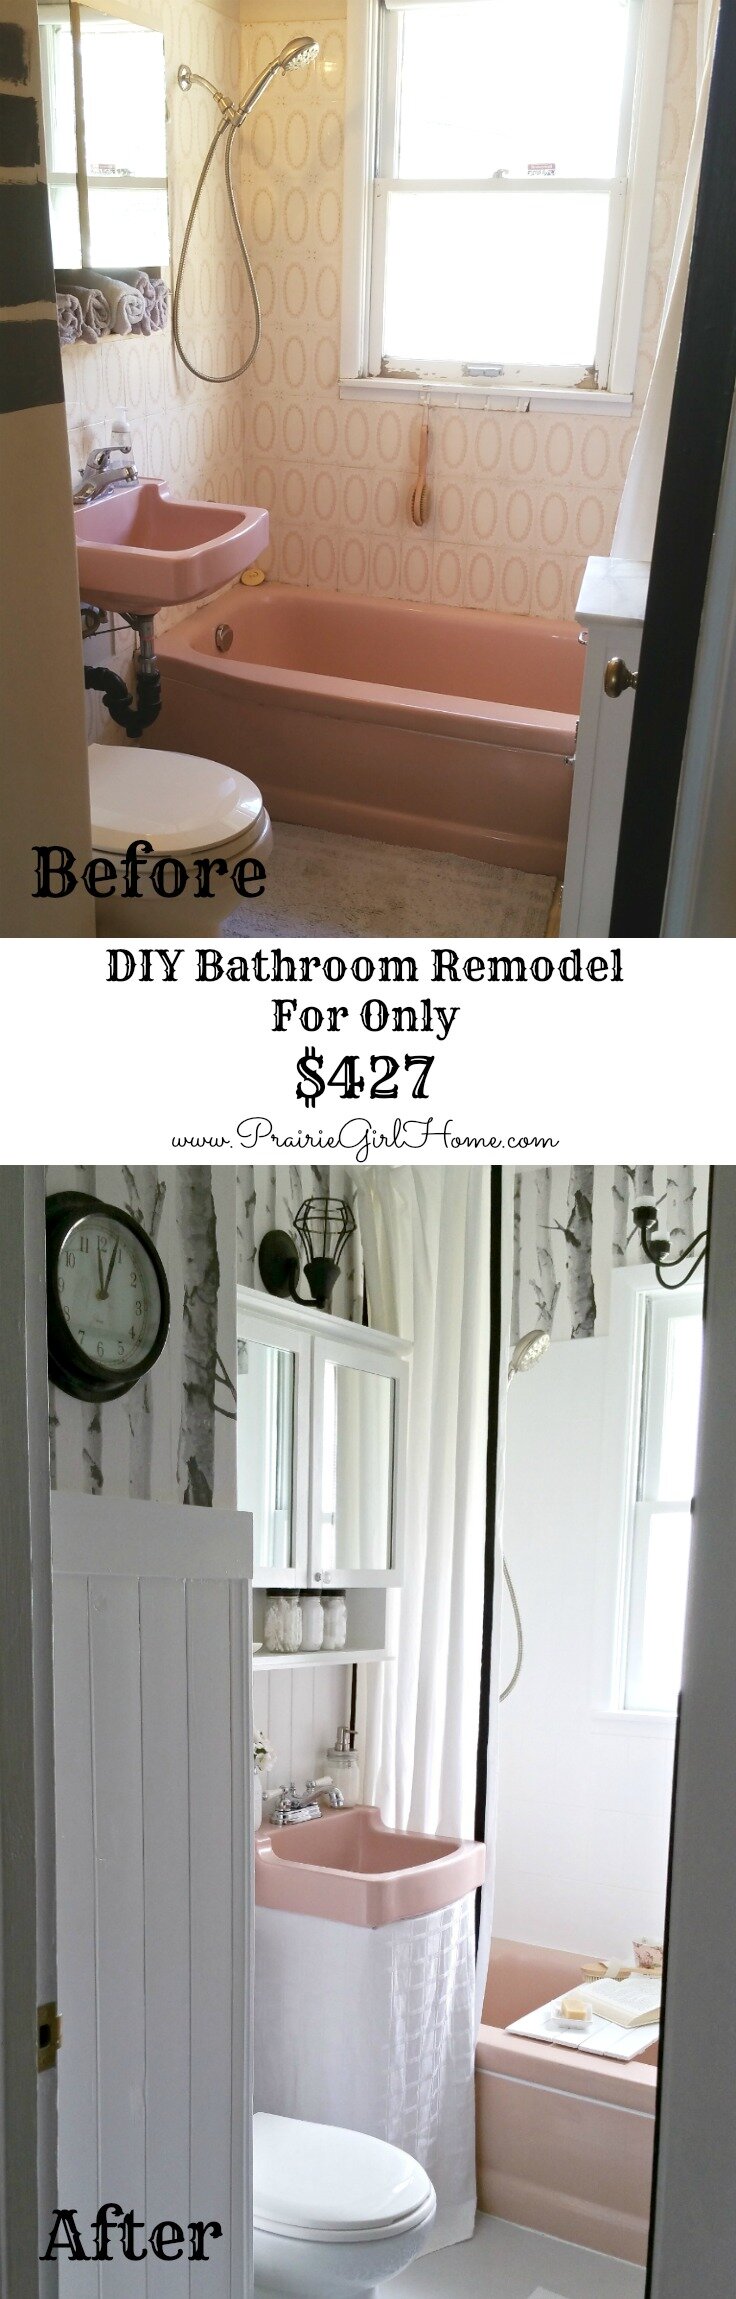
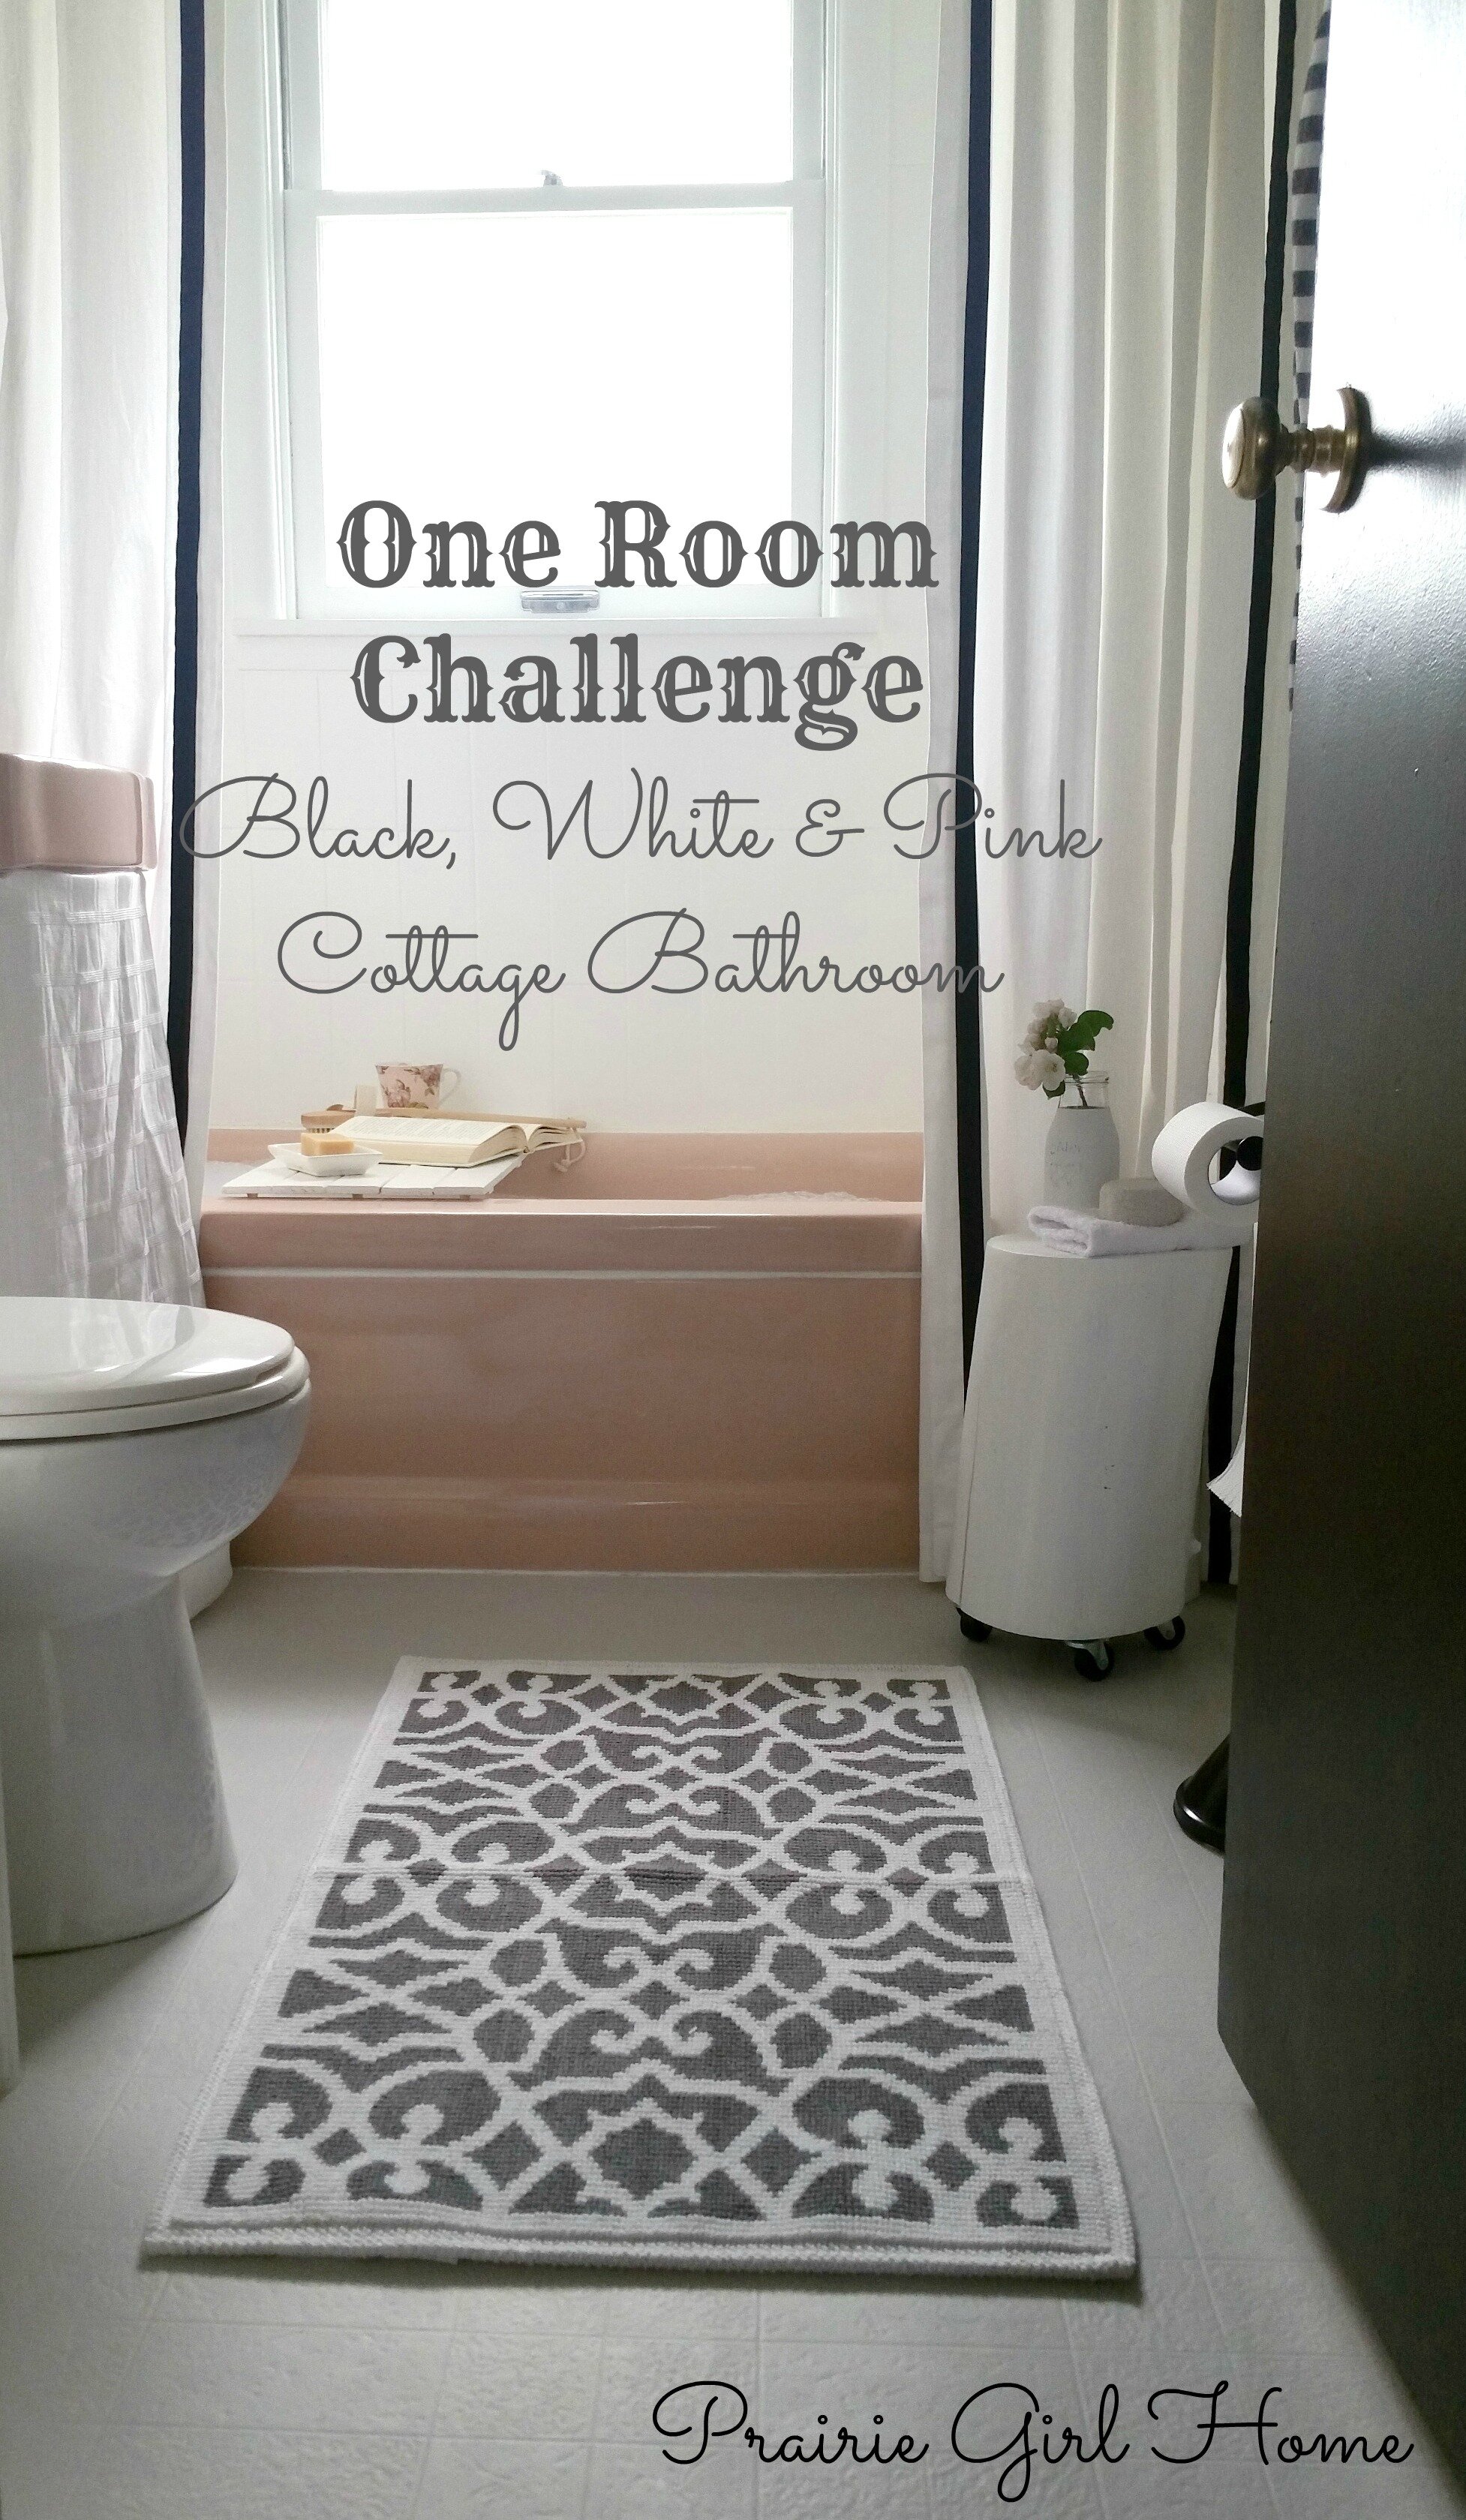
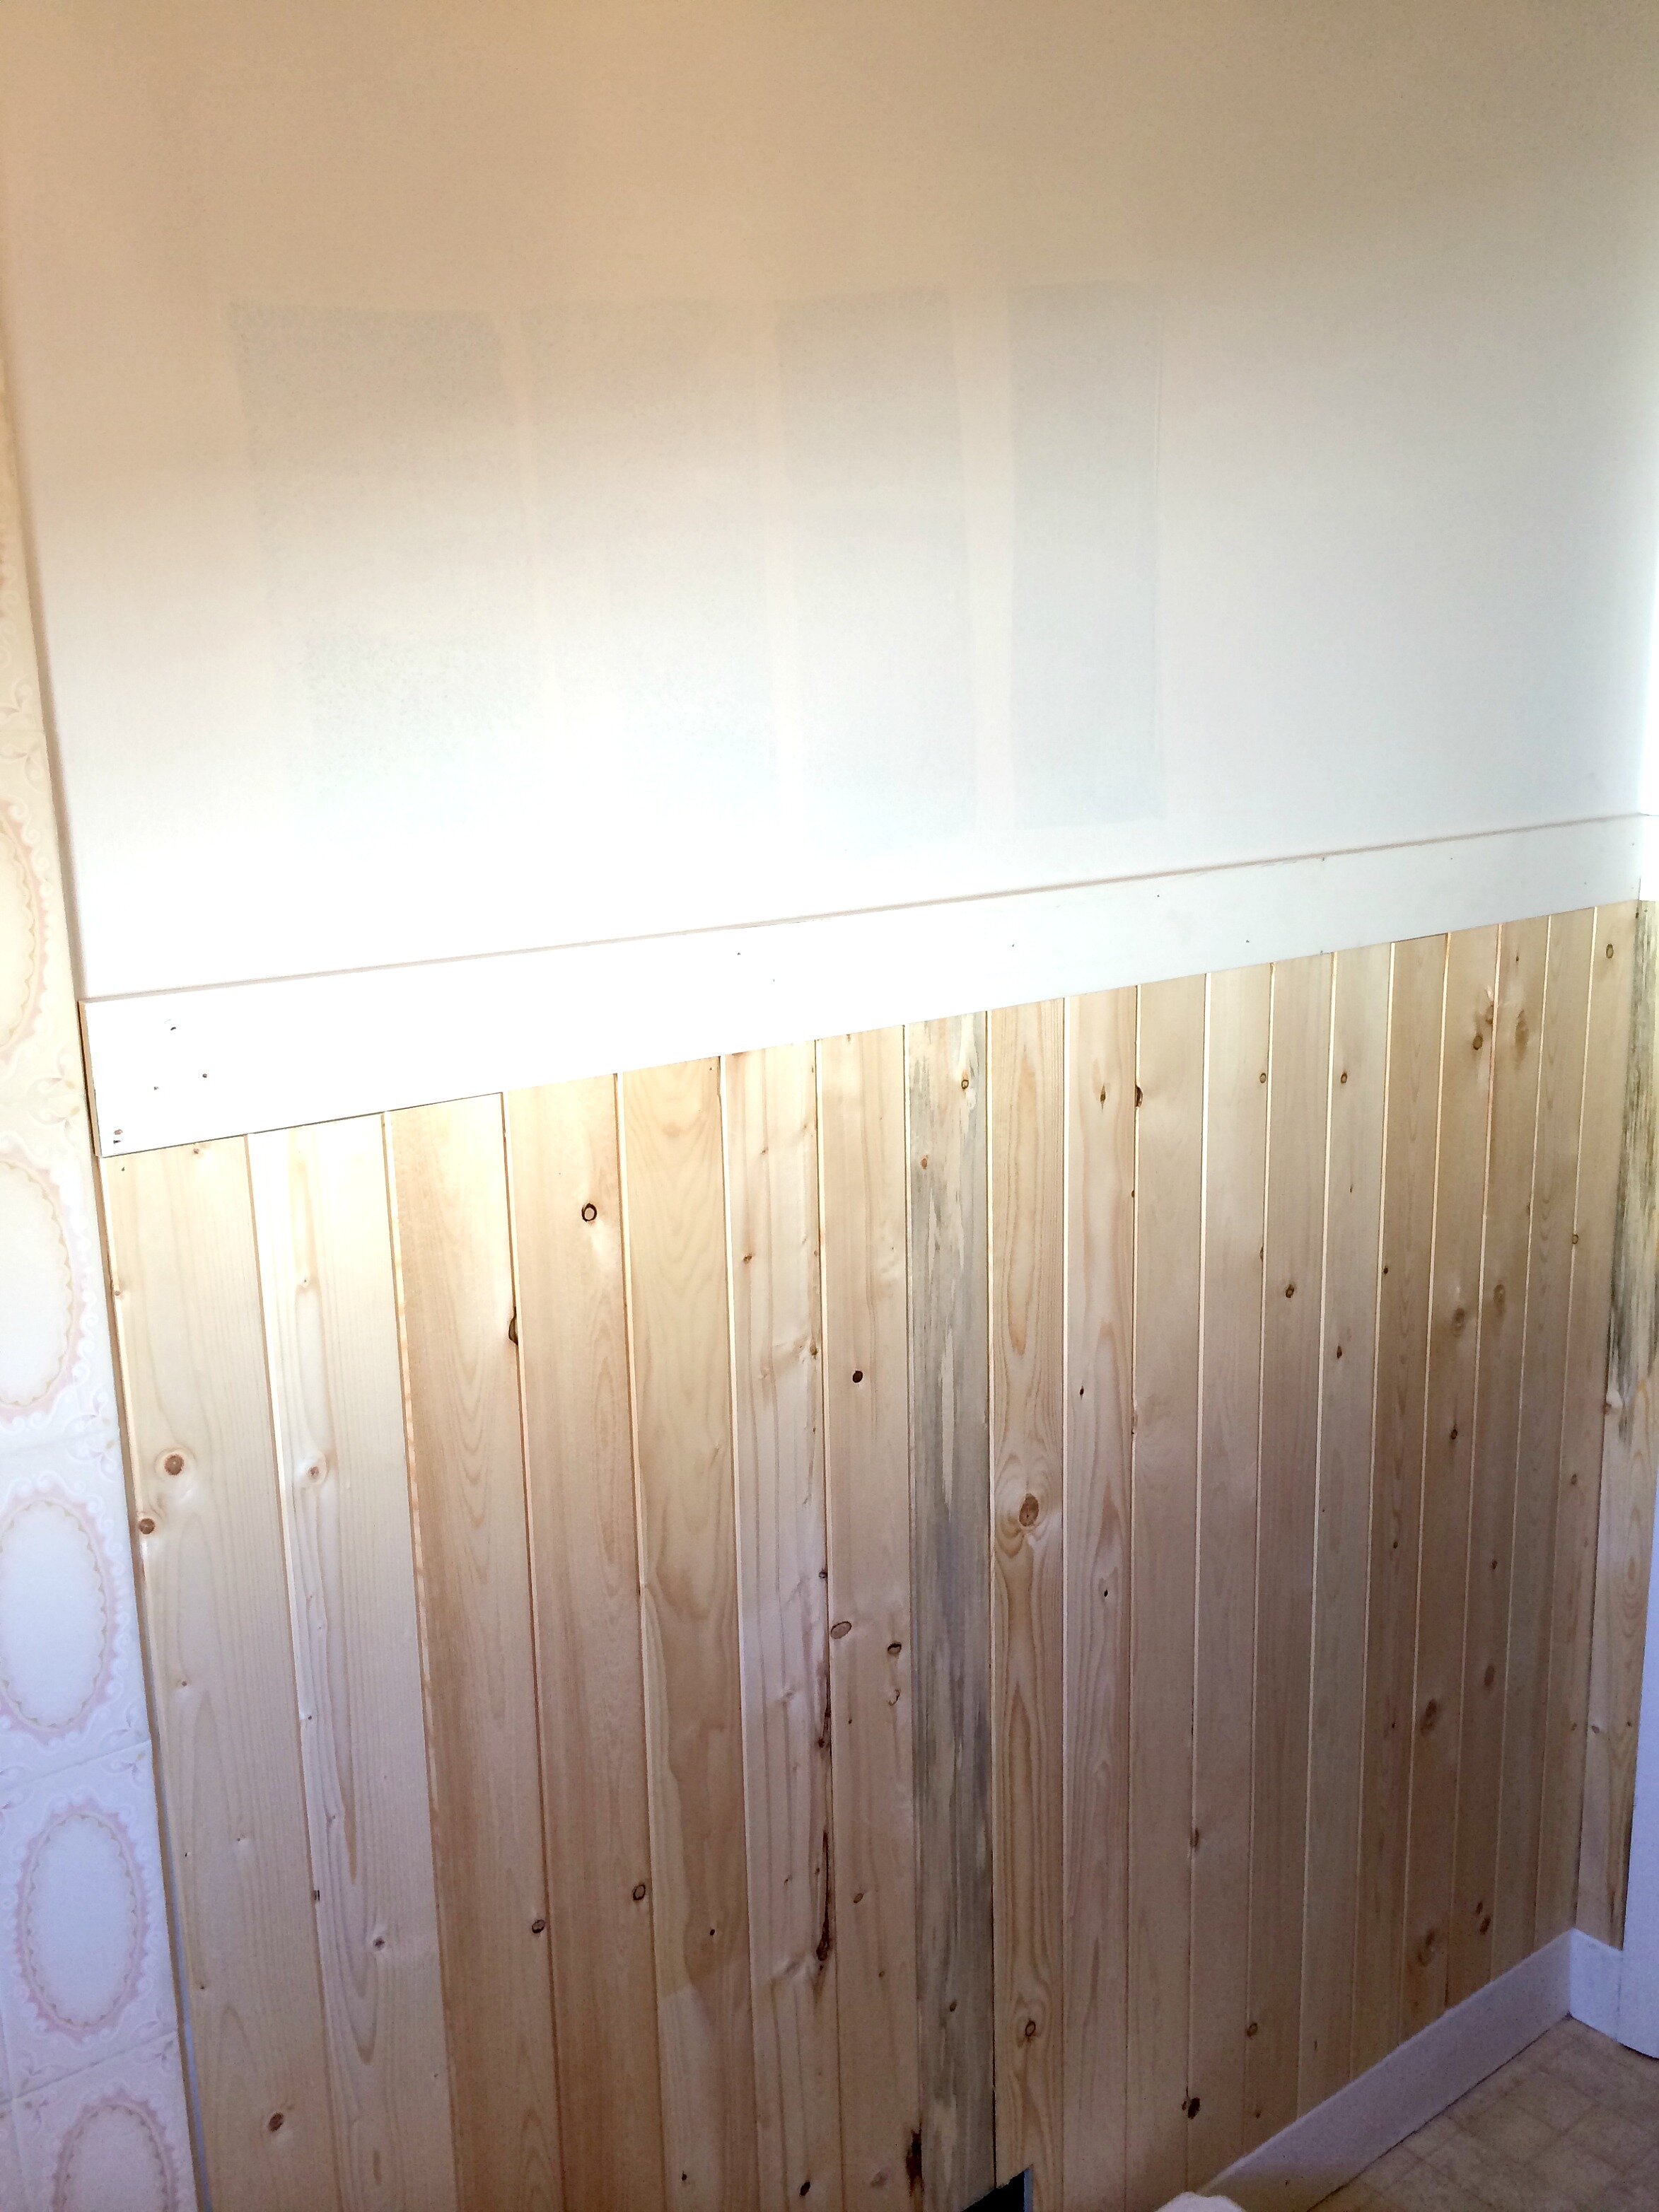
Currently we are participating in Calling It Home’s 6 week, One Room Challenge and we are giving our outdated 1955  bathroom a cottage glam makeover. If you missed the updates from the previous weeks, you can find them here:

Week 1 – Our Cottage Bathroom Makeover

Week 2 – Our Cottage Bathroom Design

Week 3 – Cottage Bathroom Progress

Week 4 – Trim, Paint and Other Progress

So that brings us to today. Week 5. I’m pretty sure we could also label week 5 as the week mama goes crazy, cries in a corner and says, “I just want this to be over so I can have my house back!” Yup. We are at that point in the renovation. The point where the rest of the house is completely suffering, just because of one little tiny room makeover! At first, it was just one other room that became a mess – my office. After five weeks, the mess has now spilled over into every room. So if anything, I can’t wait to be done this little makeover because it means all of the paint cans and supplies can be put away and our house can go back to normal! Did I mention that we took this bathroom reno on just as we finished up our kitchen reno? So it’s basically been 3 months of chaos. It’s time to end the madness!

So what did we accomplish this week? Quite a bit of patching, caulking, sanding, priming and painting. When I left you last week the wainscoting had received one coat of primer. After that one coat a lot of the imperfections in the wood were showing up. I find that after the first coat of primer, you can really see clearly what needs to be patched. So I ended up spending a lot of time caulking gaps, filling holes, sanding and then repeating those steps when things still weren’t looking right. After all of that, the wood got a second coat of primer.

IMG_5952[1]

The wood really soaks up the primer! Tomorrow, all of the wainscoting will get it’s first coat of paint. I’m sure it will need at least two coats.

The medicine cabinet has been trimmed out and has been fully primed. I’m loving the transformation so far!

Here is what we started with:

medicinecabinetbefore

Here it is today, after we trimmed out the mirrors and added some very basic trim to the top and bottom.

medicinecabinetinprogress

I am always amazed at the power of simple trim and paint. Seriously, the change gets me every time. If you can’t afford to make any other changes in your space, just tidy up and paint! You won’t regret it.

The cabinet still needs a couple of coats of paint. This is just primer. We will also be adding some pretty little knobs. It’s all about the details! Oh, and the mirror is a mess because I never bother taping off mirror or windows when I paint. It takes far less time to just scrape off the paint with a razor once you are finished than it does to tape everything off. There’s my painting tip for the day. Don’t waste your time taping off glass or mirrors – just paint them!

My sweet husband was kind enough to give the ceiling a couple of quick coats of paint. For that we used Dulux brand kitchen and bathroom paint, eggshell finish, colour matched to Benjamin Moore’s Chantilly Lace. The cabinet, wainscoting, trim and shower tile will also all be painted in Benjamin Moore Chantilly Lace, but for those we are using their Advance paint. We had quite a bit leftover from when we painted our kitchen cabinets. Since this is a budget makeover, I am all about using what we have on hand! Benjamin Moore Advance is a water based alkyd paint and is designed for use on furniture or cabinets. The guy at my local paint store thought that it would also hold up pretty well in a bathroom. Let’s hope he is right!

If you are looking for a not too warm, but not too cold, clean, white paint colour, try Benjamin Moore’s Chantilly Lace. Our entire living room, dining and kitchen is done in that colour and we’ve been quite happy with it. It also just so happens to almost perfectly match the white in the wallpaper we chose, so that was a happy accident. Don’t you love those?

OC-65

Prepping the tile was a tedious, time-consuming job. Isn’t it always the prep that just about makes you want to quit? I despise paint prep. The actual painting is never nearly as bad as the prep. I’ll even go so far as to say that I love applying the first coat of paint. Seeing that initial transformation is always the most exciting. Now the second, third or even fourth coats of paint – those I am not nearly as fond of!

I plan on coming back soon to share a more in-depth how to on the painting of this tile, but here it is after a lot of scraping off of old silicone and chipping grout, repairing the spots that were missing grout, scrubbing, caulking around the window trim, more scrubbing and finally – primer.

IMG_5944[1]

I used Dulux brand “Gripper” primer. It is designed to adhere to tile. I am thinking I should probably do one more coat of primer and then I can move on to paint. Let’s hope the Advance paint holds up!

I also got around to sanding the tree stump that will be made into a little stool/side table. I thought the sanding would take forever, but it really shaped up nicely after about 45 minutes or so.

IMG_5947[1]

Originally I had planned on painting it white, but I’m having second thoughts and I might just end up sealing it as is, or staining it just a touch darker before sealing it. I think it will be gorgeous either way. I’m so happy I made for this little project! I think it is going to add so much to the room.

So we obviously still have quite a ways to go if we are going to finish up this week. First up, a lot of painting! My mom has lovingly offered to come and help me wallpaper on Saturday afternoon. This room is tiny, but there are a lot of corners, a window, a door, a light fixture, a cabinet and a shower surround to work around. That is a lot of tiny cuts! Here is the wallpaper, from Bouclair Home.

iphone april 13 338

I ordered the new vinyl flooring, but unfortunately it won’t be here in time for the reveal next week. This is the pattern I decided on, Filagree Iron by Mannington.

IMG_5797

I’m in love with it. Love, I tell you. I’m a little sad it won’t be here in time for the final reveal, but it will be worth the wait. I am hoping to at least get a couple of coats of primer down on our old lino in time for the reveal next week. If I don’t, I’m afraid all of our hard work might be for nothing because the yellowy/beige floor will stick out like a sore thumb next to all of the beautiful bright white!

Here is how our to-do list is shaping up:

  1. Remove old tile surrounding toilet, sink and medicine cabinet. DONE
  2. Prime walls and ceiling. DONE
  3. Add wainscoting to lower half of walls. DONE
  4. Add trim, prime and paint and add hardware to medicine cabinet. STARTED
  5. Paint ceiling. DONE
  6. Prime and paint trim. STARTED
  7. Fill the really big knots in the wood, prime and paint wainscoting. STARTED
  8. Repair chipping grout, prime and paint shower tiles. Silicone around tub. STARTED
  9. Install window privacy film.
  10. Install wallpaper on top half of wall.
  11. Install new light fixture above medicine cabinet.
  12. Add shelf above door for extra storage? (We definitely will be adding this at some point in the future, but I’m not sure if we will have time for it this week. Stay tuned!)
  13. Install new sink faucet.
  14. Change out toilet. (I don’t think this will happen in time for the reveal next week. The new vinyl floor will not be arriving in time for the reveal and it makes no sense to replace the toilet now, only to have to disconnect it when the floor is installed in a couple of weeks.)
  15. Prime, paint and stencil old lino floor OR buy new vinyl floor and install. (New floor ordered, but will not be arriving until May 25th. Will do a quick paint job on old lino.)
  16. Choose fabric, sew and install sink skirt.
  17. Spray paint chandelier, buy battery operated candles, install.
  18. Sand and paint or stain tree stump side table. (I am ridiculously excited to finish this little project! It is going to add such a natural touch to the bathroom.)
  19. Decorate! (Shower curtain, artwork, hooks for towels, toilet paper holder and other small decor items.)

There are still a lot of details that need to be decided on. I’m excited to get the “dirty” part of this makeover done with and move on to the “pretty” part. Decorating! I still have a lot of details to decide on – but that’s the part I enjoy the most. Seeing how everything is coming together, and then adding those finishing touches.

Many thanks again to Linda from Calling It Home, for creating and hosting the One Room Challenge. Don’t forget to check out the featured designers progress, as well as the progress of the other guest participants.

Thank you so much for stopping by. Feel free to leave a comment below (if the comment box isn’t showing up below, just click the “comments” link right beside the date at the top of this post) or you can find me over on Instagram. I hope you’ll come back next week for the final reveal of our cottage glam bathroom makeover!

Signature


One Room Challenge Week 4 – Trim, Paint And Other Progress

How did that happen? Suddenly it’s week 4 of this makeover challenge. Yikes. That means we have a little less than 2 weeks left to finish up this bathroom, since I need to take photos and write the final post all before the reveal date – May 12. Game on!

Last week I shared with you all that we had  removed the old tile around the sink and toilet, patched and primed the walls and ceiling and my husband had put up the pine wainscoting and mdf trim. This week I caulked around the trim and primed the wainscoting. If you’re curious, I used Zinsser 123 Primer, the one that says it’s designed for mildew protection. Painting wainscoting is a real pain because you have to use a brush to get in each and every last groove and knot, then go back with your roller over the entire thing. I worked in small sections of 4 or 5 planks at a time. Good thing we have a small bathroom! The hardest part was getting in and around the toilet. I did my best, but if we end up switching out the toilet, I will touch up any spots I couldn’t reach then. It still needs another coat of primer, followed by paint, but it already looks so fresh and clean! I love it!

primertrim

I got one coat of primer on the medicine cabinet. We also started trimming out the cabinet to give it a little pizzazz. We aren’t finished yet, we still need to add some trim just beneath the bottom shelf, but you get the idea of where we’re headed. Once it is all white it’s going to look so fresh!

cabinet trim

My husband used a brad nailer to attach the top trim pieces and No Nails adhesive glue to attach the trim to the mirror. The only problem we ran into was figuring out how we can add knobs to the fronts of the cabinets. I really had my heart set on these cute little white and silver “flower” knobs from Michaels. We thought it would be easy to drill through mirror, but as it turns out, it’s definitely not. You need to use a “diamond” bit on our drill, which is fine, but apparently unless you are very experienced it seems you are more likely than not to break the mirror. Not cool. I called around town and it was going to cost around $20 to get a professional to drill the three holes for us, but they said they couldn’t guarantee the mirror wouldn’t break. The whole point of remaking our existing medicine cabinet is to save money. So I don’t want to pay to have someone drill the holes for us, only to end up breaking the mirrors and needing to then replace them entirely. We brainstormed a few options for making it work, but in the end we are going with the easiest route – I have some very lightweight acrylic knobs that look like glass, but will be light enough to adhere to the trim with just glue. Or so I hope! They won’t be functional, we will still have to open the cabinet with the little hand notches on the bottoms of the doors as we have always done, but that’s no big deal. They will look pretty!

Last week I mentioned that I was contemplating ordering some vinyl because I didn’t want to spend a ton of time painting our old lino and I was worried about the painted floors holding up to the abuse our one and only bathroom endures! I think I knew which one was my favourite of all the options I shared last week, but I was looking for some confirmation, so I posted a picture to instagram. In the end my original choice, Filagree Iron by Mannington, came out the clear winner and I felt really good about my choice.

IMG_5831

Then I went to the store to order it. Originally I was told it should only take a couple of days to come in. Then I was told that since this is a new pattern it is currently still in production and the expected arrival date is… May 13. Womp-womp. So I can order it, but it won’t be here in time for the final one room challenge reveal date on May 12. I was really disappointed because I so wanted to finish in time! I even started contemplating other options. I did find one that could definitely work in the room.

IMG_5852

The grey and white plank “wood” would look cute with the grey and white birch wallpaper and painted wainscoting. I like it. Do I love it? No. Not when I compare it to my first choice. So as much as I would like to have a fully completed room by the final reveal date, I’ve decided not to settle and I will order my first choice. I think I will just do a quick coat of white or light grey paint on the lino in time for the final reveal. That way the yellowy beige lino won’t be screaming “look at how ugly I am” and taking away all the attention from everything else in the room that will be complete!

I found a sink faucet this week.

faucet

It’s by Danze, and it was on sale for $38 at Canadian Tire. I think the white handles add a cute little cottage touch, but the shiny chrome keeps it a bit glam. Cottage glam, that’s my jam! (Apparently geeky rhymes are also my thing;)

So, we obviously still have a lot of work left to do! This week I really hope we finish up all the painting, a well as the wallpaper. Overall though, I’m feeling confident that we will finish in time, other than the floors which won’t be here in time. (Unless a miracle happens!)

  1. Remove old tile surrounding toilet, sink and medicine cabinet. DONE
  2. Prime walls and ceiling. DONE
  3. Add wainscoting to lower half of walls. DONE
  4. Add trim, prime and paint and add hardware to medicine cabinet. STARTED
  5. Paint ceiling.
  6. Paint trim. STARTED
  7. Fill the really big knots in the wood, prime and paint wainscoting. STARTED
  8. Repair chipping grout, prime and paint shower tiles. Silicone around tub. GROUT REPAIRED
  9. Install window privacy film.
  10. Install wallpaper on top half of wall.
  11. Install new light fixture above medicine cabinet.
  12. Add shelf above door for extra storage???
  13. Install new sink faucet.
  14. Change out toilet. (I’m too cheap for even the cheapest one at Home Depot – $110 – but I think I can find a decent on at the ReStore for $50. I’m not too picky as long as it is just a basic white, round toilet in decent condition.)
  15. Prime, paint and stencil old lino floor OR buy new vinyl floor and install. (WILL DO QUICK PAINT JOB AS VINYL WON’T ARRIVE IN TIME)
  16. Choose fabric, sew and install sink skirt.
  17. Spray paint chandelier, buy battery operated candles, install.
  18. Sand and paint tree stump side table??? (I have serious doubts that I will get around to this in time!)
  19. Decorate! (Shower curtain, artwork, hooks for towels, toilet paper holder and other small decor items.)

Time to get busy!

Thanks again to Linda from Calling It Home, for hosting this fun challenge! Please check out the One Room Challenge featured designers progress here, and the guest participants here.

Kari

One Room Challenge Week 3 – Cottage Bathroom Progress

IMG_5792

How are we already at week 3 of the One Room Challenge? That flew by! The good news is that we have made some progress on the actual work that needs to happen, not just the design plan. So that’s a good thing, right? Hurray for progress!

If this is your first visit to Prairie Girl Home, you might want to get caught up by checking out week 1 and week 2 of our little bathroom makeover.

So what did we get done this week?

IMG_5709

We removed the old tile around the toilet, sink and medicine cabinet. My husband in his eagerness accidentally removed one of the shower tiles as well. I tell you, it was VERY difficult not to tell him to just keep going and take it all down! I was so tempted. The problem wasn’t that the tile was hard to remove – it wasn’t! The problem is that we don’t have the time or the money right now to replace it, or at least to replace it with what I would like. Isn’t it funny how these little renovations can quickly become an “if you give a mouse a cookie” situation! If you don’t know the children’s book I’m referring to, basically a mouse asks for a cookie, but then once he has the cookie he wants a glass of milk, and so on and so on until he has asked for so many things that finally he loops back around to asking for milk and cookies again. So I had to restrain myself and my desire to just rip it all down and start from scratch. This reno is all about working with a small budget and using what you have to create something beautiful! So the tile around the tub stays!

We did get two coats of primer up on all of the walls and the ceiling. We just used some leftover primer we had from another project, it didn’t cover as great as I had hoped, so I need to go over a few more spots again.

We also got the wainscoting up! Oh, and by we, I really mean my husband.

IMG_5792

He is completely in love with his work, and of course feels we should just stain the wood for a true “cabin” feel. Nice try, hun, but that ain’t gonna happen! He was only joking, he knows I looooove white. I like to ask what his opinion is, but fortunately he completely trusts me with pretty much all of the decor decisions around here, otherwise we would be living in a very dark house with a lot of stained wood, red and plaid! When we’ve finished a project, he usually admits that he didn’t trust my vision at first but that he loves the end result.

I really struggled with the decision about how high to make the wainscoting. It seemed everything I read online said to make it either 1/3 or 2/3 the height of your wall. Ours ended up at 4’9”, or just over half the height of our walls.

IMG_5791

I wanted it to be high enough that it covered the entire area behind the sink, as well as that little shelf at the bottom of our medicine cabinet. My husband said he thought it should clear the lightswitch. I thought it should be high enough that we could hang hooks that hold our towels from the trim piece, but still short enough that I could hang artwork just above the trim piece. So we ended up at this height. Now I’m just a little worried I made a mistake. I’m worried that it cuts the room in half and makes our walls look even shorter than they are. Well, quite honestly, we aren’t changing it now. I’m just happy that we have made some progress. Also, things always look so much better once they are painted and the room is finished. The middle of a project is never pretty!

We ended up having just enough boards to finish the wainscoting, so the ceiling will not be planked. It was only a maybe on my idea list, not a big deal. I’m really not too disappointed, maybe next time!

IMG_5793

I think our door needs another coat of paint. I used Benjamin Moore Onyx, colour matched in Behr’s semi-gloss interior. I painted all of our interior doors in this, but they have always look streaky when the sun is shining directly on them.

I also made a quick stop to one of my new favourite little thrift shops. I had picked up a frame there a few weeks ago, so I went back to see if they had another similar one. I found it’s twin! Check it out!

IMG_5794

The empty frame was $2 and the frame with the oil canvas was $10. I don’t care much for the artwork, I bought it just for the frame.  I’m completely in love with the ornate curvy details. I wasn’t planning on using gold, but it would pop against all the grey beautifully. We shall see. I may end up just spraying them white. Stay tuned. I will also need to DIY some art to go inside of them. I have a few ideas, we’ll see what I can come up with in time.

I also came up with another idea this week, but I really don’t know if I have enough time to complete it before the end of this challenge. I almost forgot about these old tree stumps we have in our garage, that I had planned on turning into side tables.

IMG_5796

They’ve been drying out for almost two years, but they still feel very damp. I’m not sure if that’s because they were sitting on the cold concrete garage floor or if it really just takes that long to properly dry them out. The bark has been peeled and we did start sanding them. They need a lot more sanding! I thought one would be cute right beside the tub, where the little white cabinet was. I love the storage cabinet, but it does take up quite a bit of room. I love the idea of a little stool beside the tub where we could set a little book and a cup of tea during a bath. Ah, sounds relaxing, right? I would probably paint it white, or maybe do a white wash, because that’s what I do – paint things white – but they would still look super cute and go with the birch wallpaper I have picked out. I’ll have to see if I have time to get to this little project.

I also decided to pop into a local flooring shop, just to see if they happened to have any remnant pieces that would go with my design plan. I still will probably end up painting the old lino floor with a stencil, like I originally planned, but I’m a little worried about durability. Not to mention it would save a lot of time to just have something new installed, which I’m assuming would only take a few hours at the most. Priming, painting, stenciling and then adding poly to our existing floors is going to be a big job, with lots of drying time required. Did I mention this is our only bathroom? Yikes. I’m not sure how exactly we’re going to handle that one. Quick drives to the corner gas-station? Begging the neighbours to use their washroom? Port-a-potty??? Hmm. I don’t think I really thought this idea through properly! Maybe buying a new sheet of vinyl is the way to go. The shop didn’t have any remnant pieces that I liked, but I did find some interesting options that we could order in.

IMG_5797 IMG_5798 IMG_5800 IMG_5801 IMG_5799

How completely gorgeous are those mosaic options? It’s almost exactly what I had in mind for a stencil! These are all from a company called Mannington. The patterns I have shown you above are called Filigree and Empire. They both have a few different colour options, but I think all of the ones pictured above could possibly work. I would need to bring in my wallpaper sample to see which option would be the best fit. I’m still not sure what to do, because while these are not insanely priced, we hadn’t planned on doing the floor as well. I’m just not sure I want to invest the time and energy and money into painting the lino when I’m really not sure if it will hold up to use!

So we obviously still have quite a few decisions to make, but here is how our to-do list is looking now.

  1. Remove old tile surrounding toilet, sink and medicine cabinet. DONE
  2. Prime walls and ceiling. DONE
  3. Add wainscoting to lower half of walls. DONE
  4. Add trim, prime and paint and add hardware to medicine cabinet.
  5. Paint ceiling.
  6. Paint trim.
  7. Fill the really big knots in the wood, prime and paint wainscoting.
  8. Repair chipping grout, prime and paint shower tiles. Silicone around tub.
  9. Install window privacy film.
  10. Install wallpaper on top half of wall.
  11. Install new light fixture above medicine cabinet.
  12. Add shelf above door for extra storage???
  13. Change out sink faucet. (I think I have decided on one that is affordable, but still keeping an eye out for anything used that might pop up.)
  14. Change out toilet. (I’m too cheap for even the cheapest one at Home Depot – $110 – but I think I can find a decent on at the ReStore for $50. I’m not too picky as long as it is just a basic white, round toilet in decent condition.)
  15. Prime, paint and stencil old lino floor OR buy new vinyl floor and install.
  16. Choose fabric, sew and install sink skirt.
  17. Spray paint chandelier, buy battery operated candles, install.
  18. Sand and paint tree stump side table???
  19. Decorate! (Shower curtain, artwork, hooks for towels, toilet paper holder and other small decor items.)

Hmmm, somehow my to-do list actually got longer, not shorter. Oh dear. Well, we will just have to see what can be done in the next three weeks!

Thanks for stopping by! I will be back next Thursday with more progress. Don’t forget to check out the progress of the featured designers and the other guest participants of the One Room Challenge over at Calling It Home!

As always, you can also follow along with progress updates over on Instagram, @prairiegirlhome.

Kari